
How to Connect a Nanit Camera to Any WiFi Network
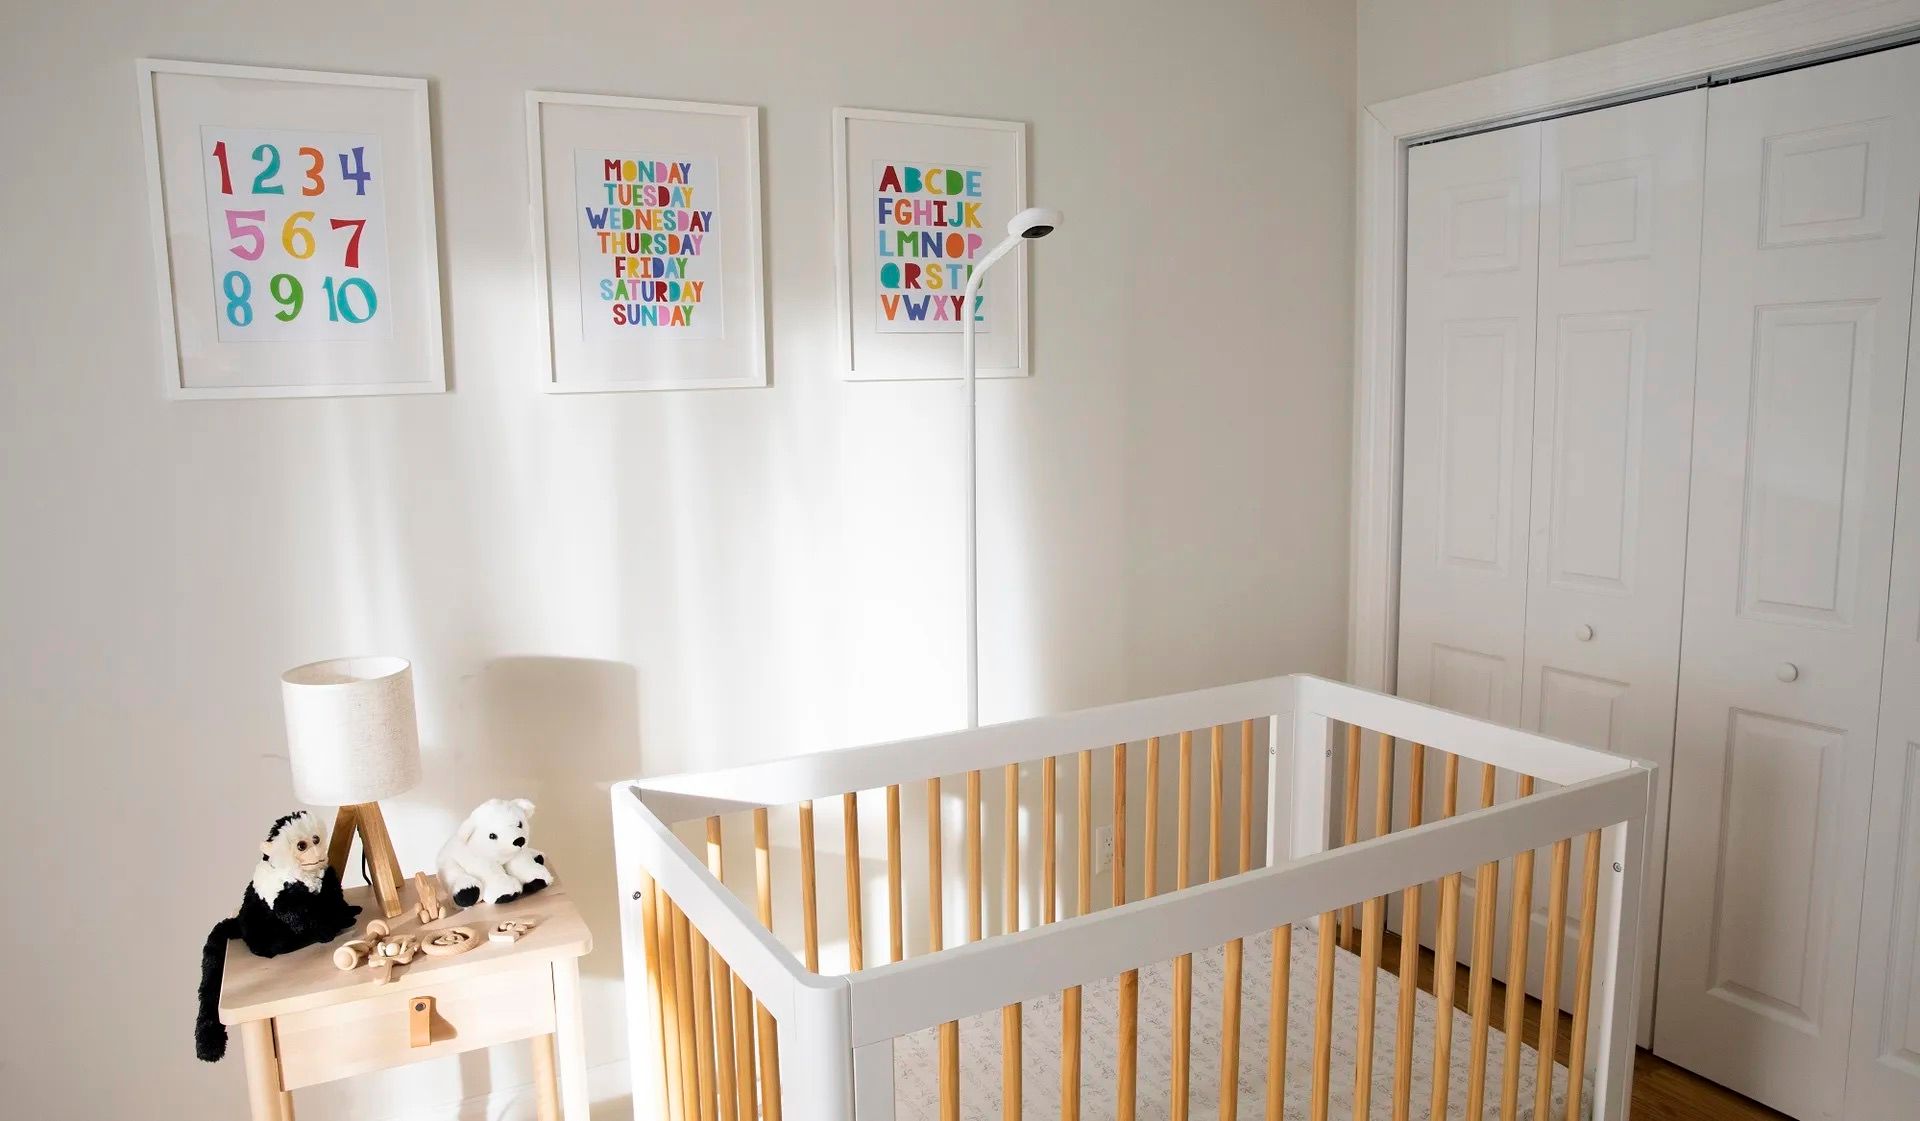
Image credit: Tom’s Guide
I love gadgets, and becoming a parent greatly expanded the number of products I get to research, configure, and maintain. This also means I occasionally have an opportunity to go deep on a new technical problem. The latest example is with the Nanit Pro Camera. It’s a small WiFi camera you mount to the wall or place on a stand, and it allows you to see live video of your baby using a mobile app. This is different from a EuFy Baby Monitor (yes two cameras pointing at the same baby) which broadcasts to a dedicated monitor using RF instead of WiFi. Using a EuFy is helpful because you don’t need to launch an app to see what’s happening in the baby’s room; you just glance at the portable monitor. It’s important to understand the difference: the Nanit broadcasts the video feed to a server while the EuFy broadcasts to a local device.
My wife, son, and I recently visited Philadelphia so he could meet his great grandmother (don’t say that “nasty” word around her) and only brought the Nanit. The hotel provided a crib and we used a SlumberPod (a must for all parents who travel with babies) to ensure Wolfe had a dark environment to sleep in. After constructing the SlumberPod, which conveniently has a small pocket to place a camera in, I began the process of connecting the Nanit to the hotel’s WiFi network. This is where the trouble began.
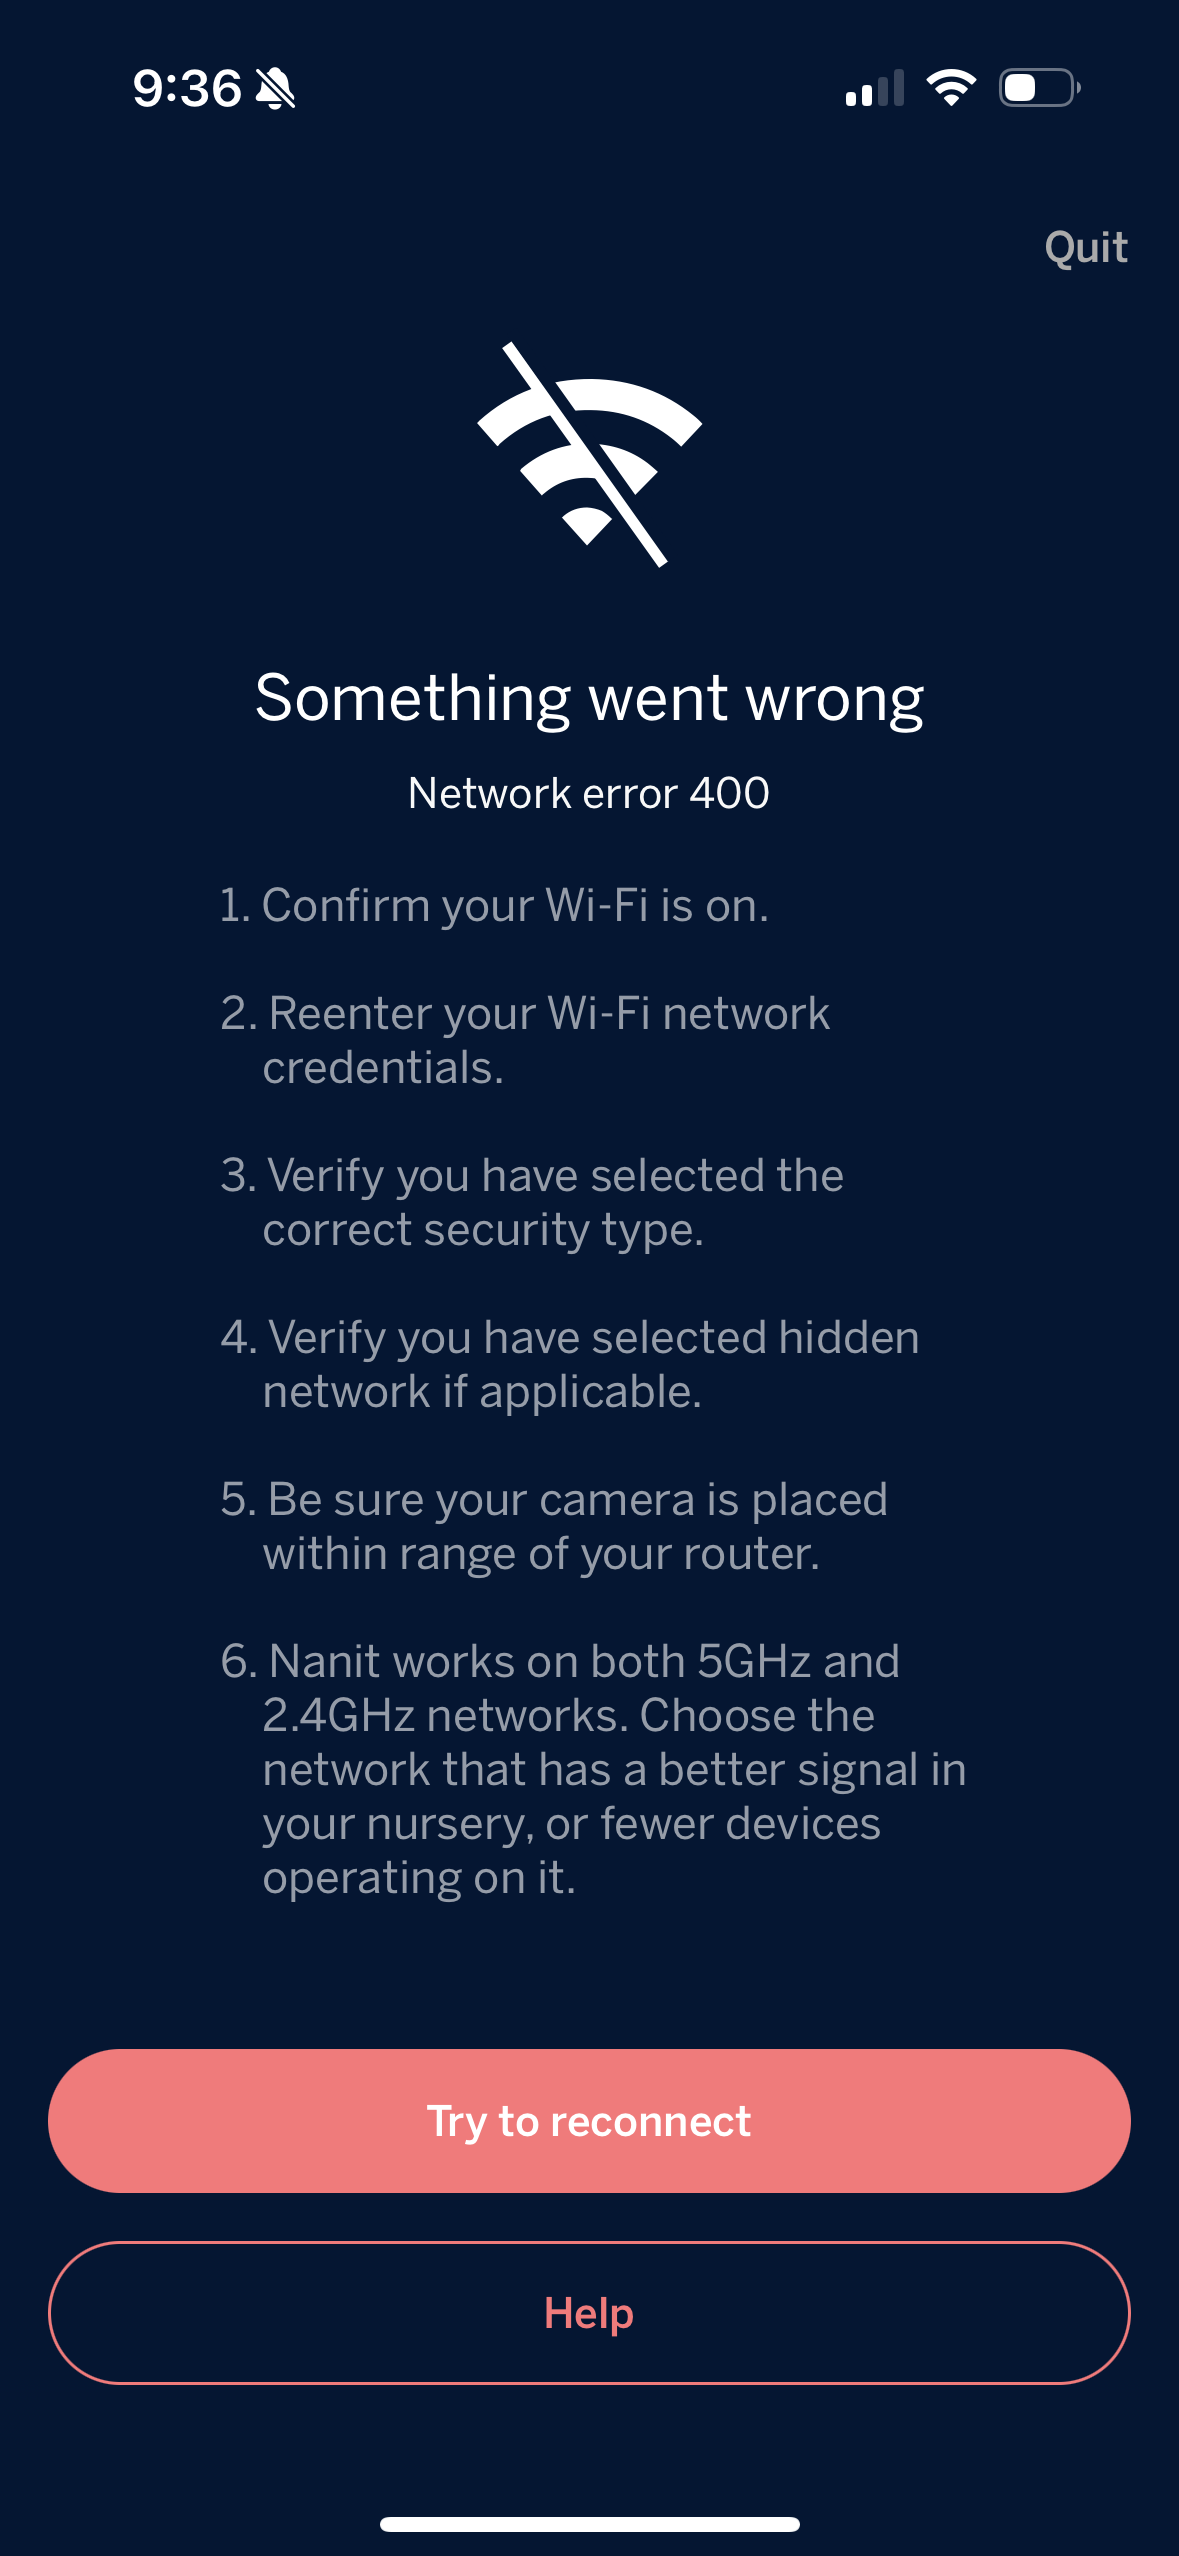
The hotel’s WiFi did not require a password. You simply connect to the open network and authenticate using your last name and room number in a webview. We’ve all seen this before at hotels, offices, airports, etc. The problem is the Nanit’s network settings require both an SSID (network name) and a password. There is no way around this. Fortunately the hotel also offered a password-protected network so I tried that and consistently encountered “network error 400.” The only way to make this work was to get around the passwordless network.
Those margins are a bit overkill
I searched DuckDuckGo, asked ChatGPT for help, and browsed Reddit. Nothing. Other users complain about the password requirement, but Nanit has not offered a solution in the app. Finally I checked Nanit’s documentation and learned that their cameras don’t work with “captive portal” networks which use a webview to authenticate. The way to make it work is by using a personal hotspot or a travel router. Now I was intrigued!
Personal Hotspot
Let’s start with the personal hotspot because this took some thinking and tinkering. Here is the process I came up with:
- Activate the personal hotspot on my iPhone
- Connect to the Nanit with my wife’s iPhone
- Configure the Nanit’s network settings to talk to my iPhone’s hotspot WiFi network
Now whenever I turned on the personal hotspot on my iPhone, the Nanit would automatically connect to the phone after a few seconds, and start broadcasting the video feed to the server. This technically worked but the Nanit would chew through my data plan if I left the camera connected to the hotspot network all night. I had to find a better solution.
Travel Router
I recalled listening to an episode of The Vergecast and the hosts discussed the convenience of traveling with a portable router. If you use the same SSID and password as your home router, all of your devices will automatically connect to the portable router. Phones, tablets, laptops, and, most importantly, Nanit cameras. I was delighted to finally have a reason to buy another tech product.
I ordered a GL.iNet GL-SFT1200 on Amazon for $39.90 and luckily had an option for one-day shipping. I was impressed by both its low cost and small size. It’s perfect for throwing into a suitcase. If a future trip includes my wife and I both on video calls, I will probably purchase a version that can handle more bandwidth. However, for a single Nanit camera I assumed it would suffice.
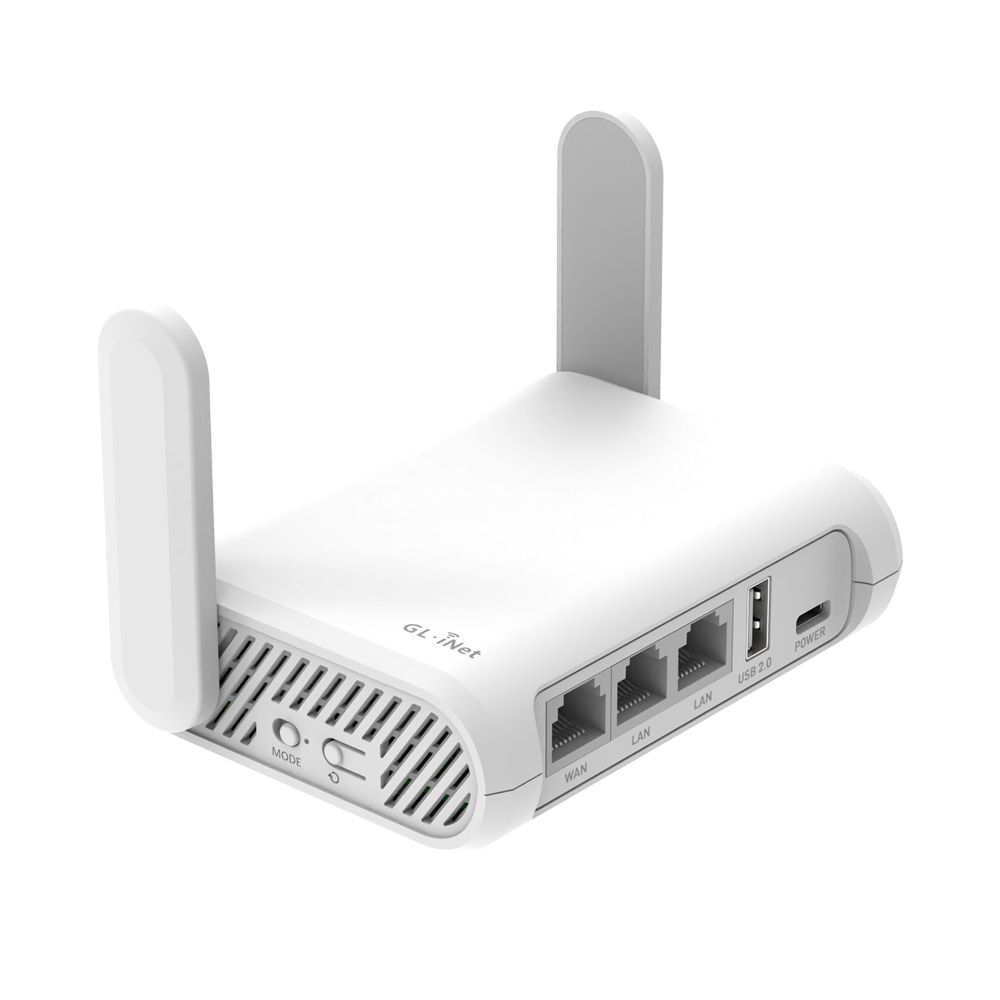
GL.iNet GL-SFT1200
The next step was to configure the router to extend the hotel’s WiFi network into a new network with my home’s SSID and password. This would allow the camera to connect automatically as discussed above. Here are the steps I followed:
- Connect the router to power
- Connect your laptop to the router’s WiFi network which starts with
GL-SFT1200... - Open a browser and go to
192.168.8.1(yes that should look funny to my old Linksys WRT54G owners) - Set an admin password for the router
Now you’ve reached the admin portal. The goal is to make the GL.iNet extend (or repeat) an existing WiFi network. Click “Scan” in the Repeater area to set this up.
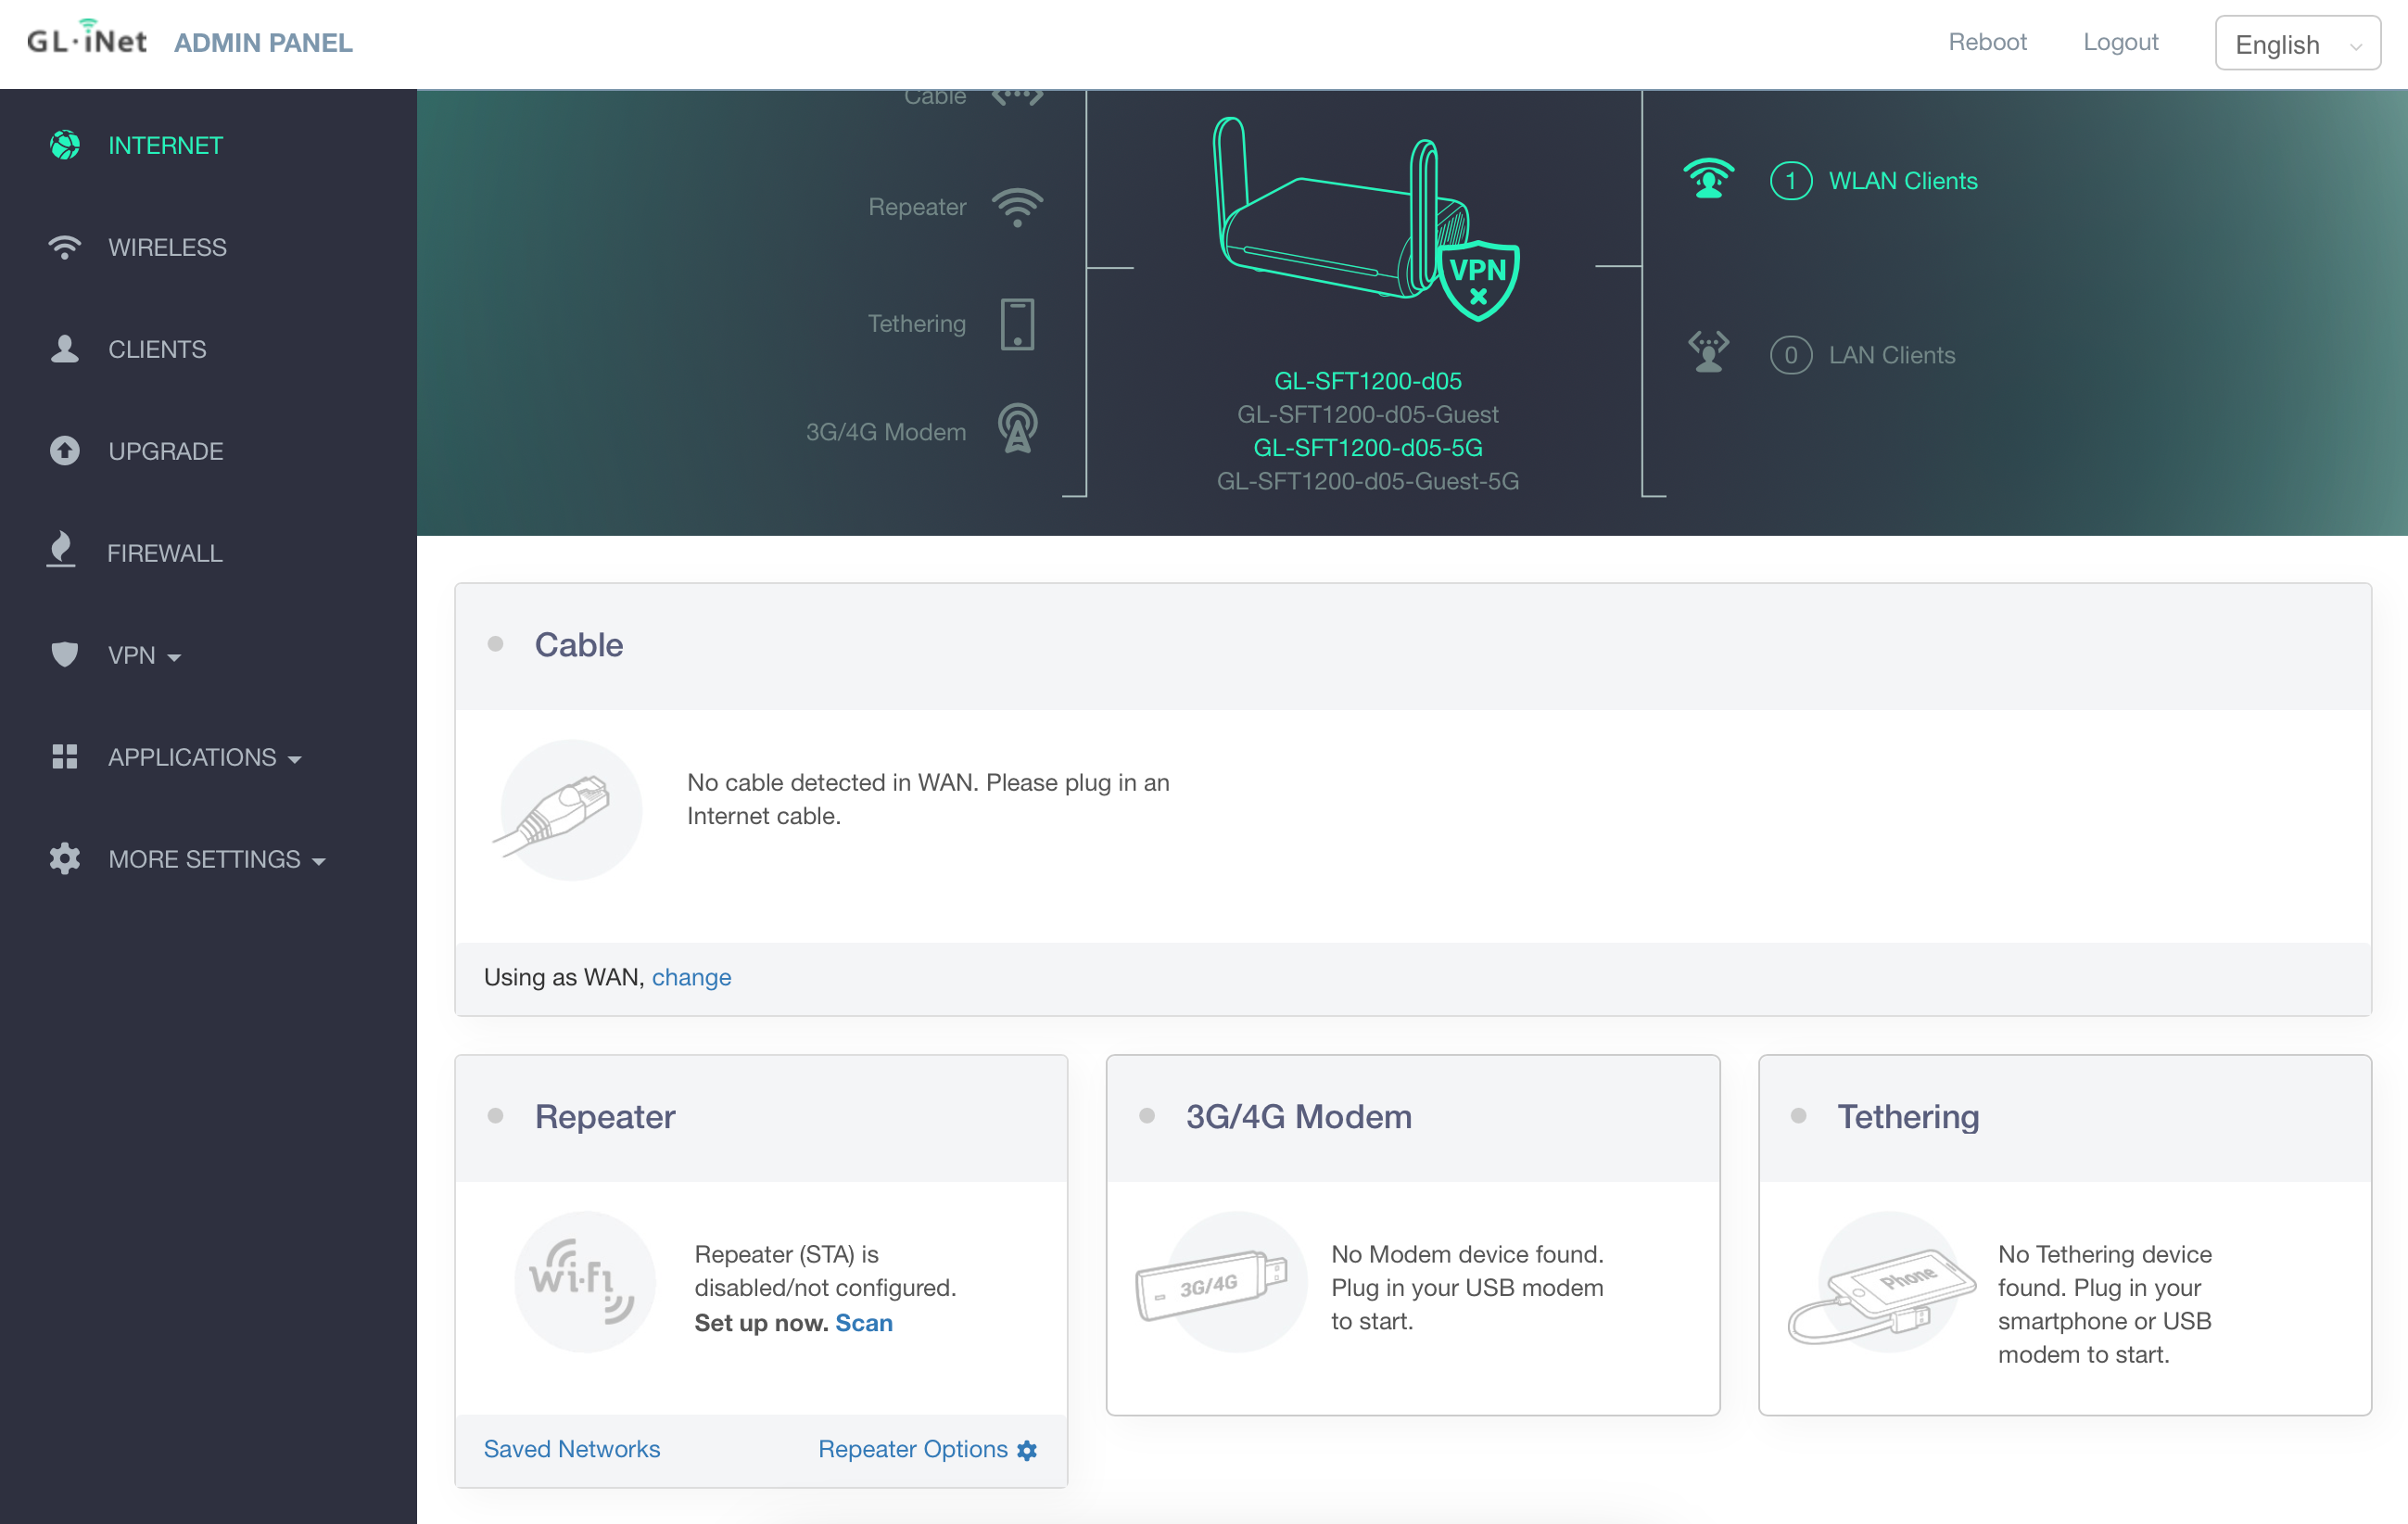
Use the dropdown menu to select the SSID of the WiFi network you want to repeat and enter its password.
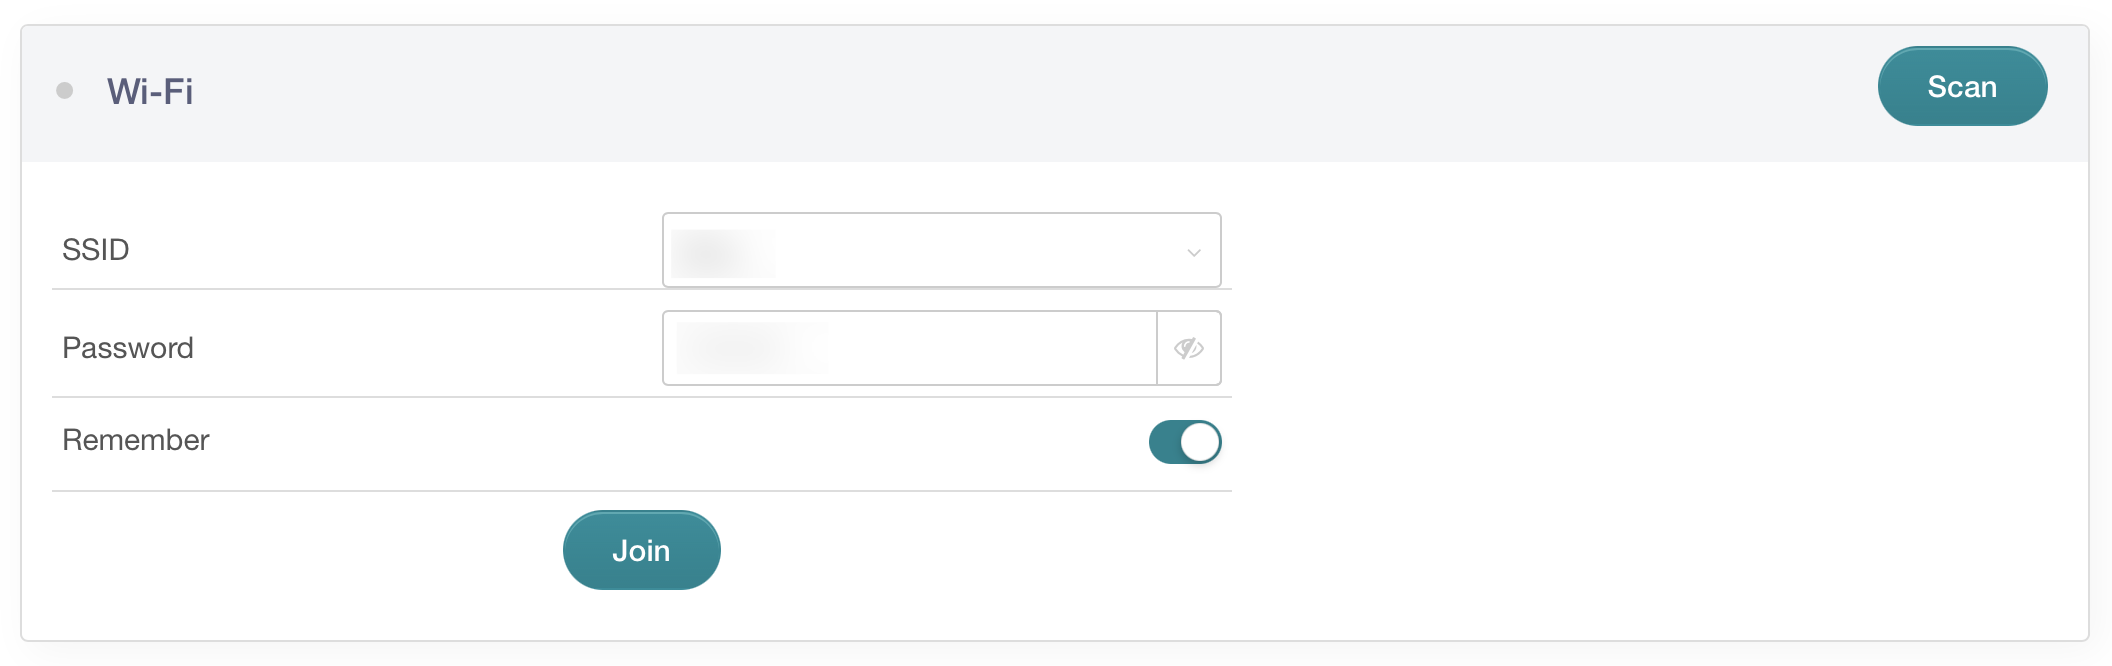
Wait a few seconds and you’re done. Seriously. It’s that easy.
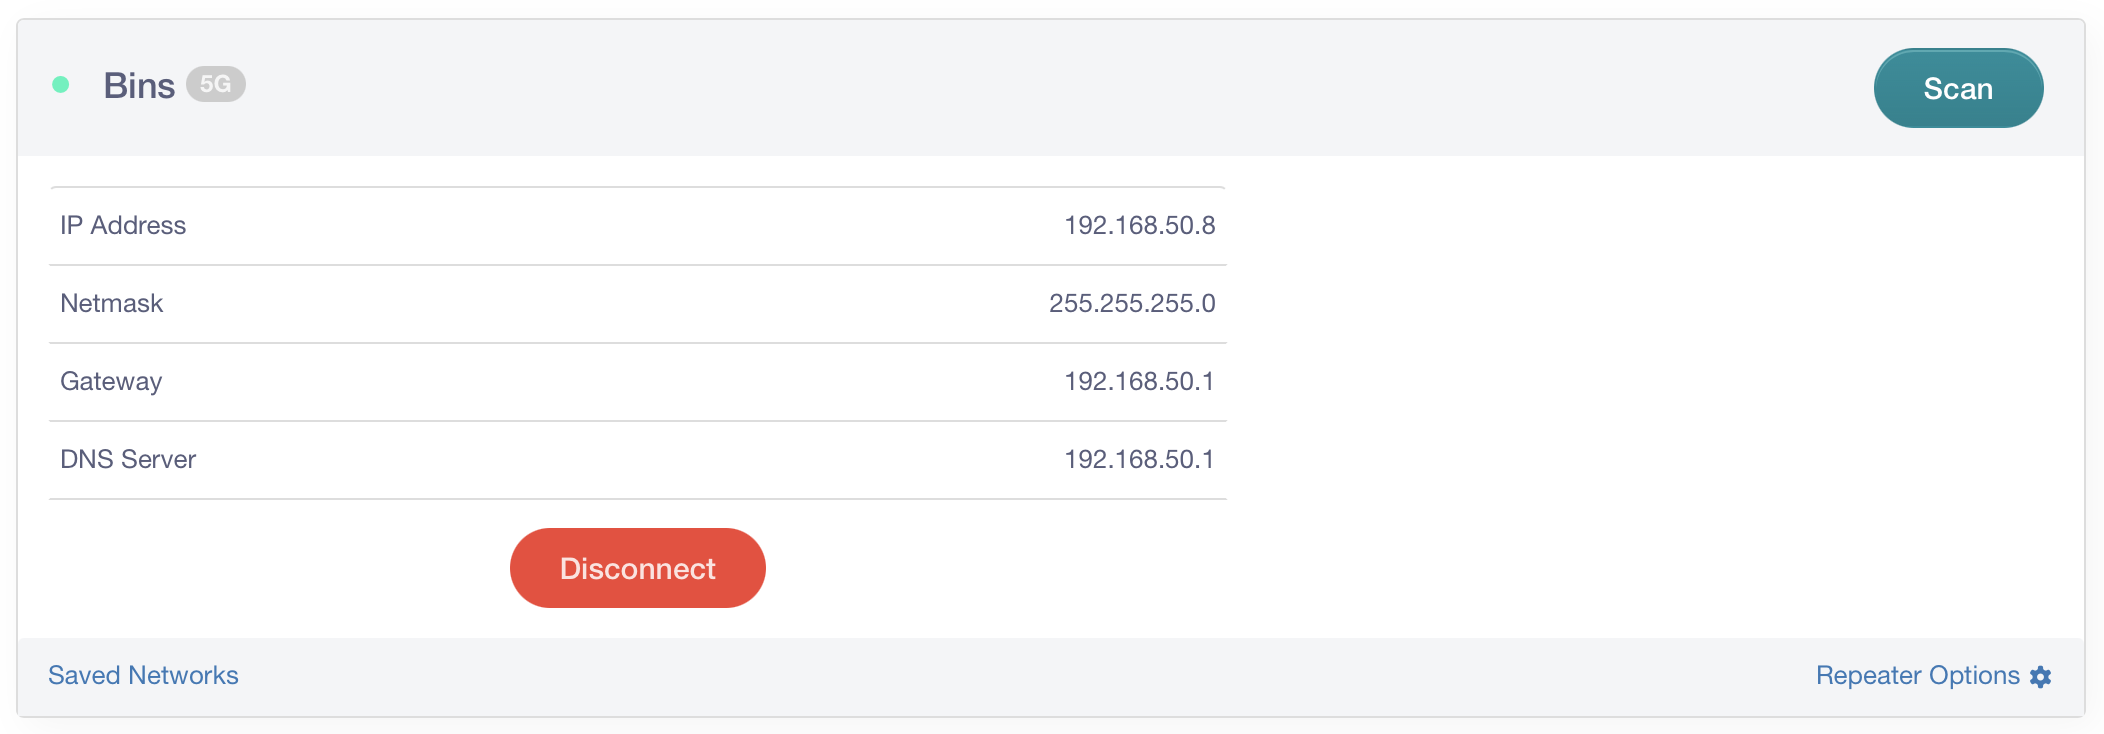
I checked the Nanit app and… boom. Live video.
This worked beautifully for extending the hotel’s WiFi network. If you have access to an existing router it’s even easier. The entire family recently took a trip to an Airbnb in Carmel which had a bunch of eero routers. I simply connected the GL.iNet (gosh that’s a bad name) to an open ethernet port on the eero and I was done. Both Nanit cameras automatically connected to the GL.iNet’s network. Zero configuration. Zero frustration. Two sleeping kids.
I highly recommend purchasing one of these for your next trip. Your family will appreciate all of their devices instantly connecting to the internet.