
Use Shortcuts to Make a Blot Post
I love using Blot.im for this website. It’s the perfect combination of customization and simplicity. I’ve tried so many platforms (Wordpress, Squarespace, Tumblr, iWeb, Carbonmade, Jekyll, etc.) and I’m delighted by Blot. However, its best feature is a bit interruptive when I have an urge to write a post. Blot uses Dropbox to host files which means writing starts with making a new file, naming it, and then copying and pasting a few snippets of data (title, tags, and date). I tried using the macOS stationery pad feature, but it didn’t quite work as expected.
I was emailing with Blot’s founder and he recommended I use Shortscuts.app to automate this process and reduce the number of clicks required to post. My goal is to click on an item in the macOS dock and automatically create a text file, name it, save it in the Blot folder on Dropbox, populate it with the required snippets of data, reveal the file in Finder, open Blot’s images folder, and open the file in Sublime Text (or whatever editor I feel like using this month). One click and start writing. The last step will be manually dragging and dropping the file from the Drafts folder to the Posts folder to actually publish it. Perhaps I’ll think of a clever way to automate that step as well.
Let’s begin.
Prompt for a Title
First, open the Shortcuts app and make a new shortcut. Search for the “Ask for Input” action, and drag it into your shortcut. Set the “Ask for” area to “Text” and the area after “with” is what you will see in the prompt. I chose something simple: “Post name?”
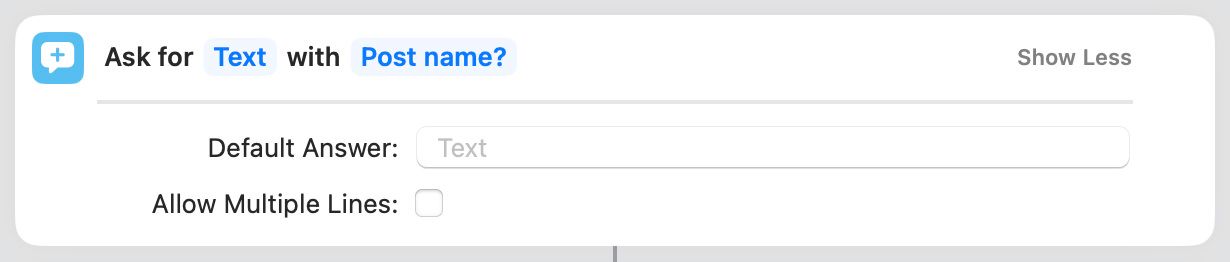
Make sure you deselect “Allow Multiple Lines” because if enabled you are unable to use the return key to proceed. Instead you will see a new line appear in the text field.
Populate the Text File with Common Data
Every time I start a new post I manually type out the date, title, and the markdown needed to produce an image (I usually include an image in posts). This is tedious considering the computer knows the date, and I already entered a title.
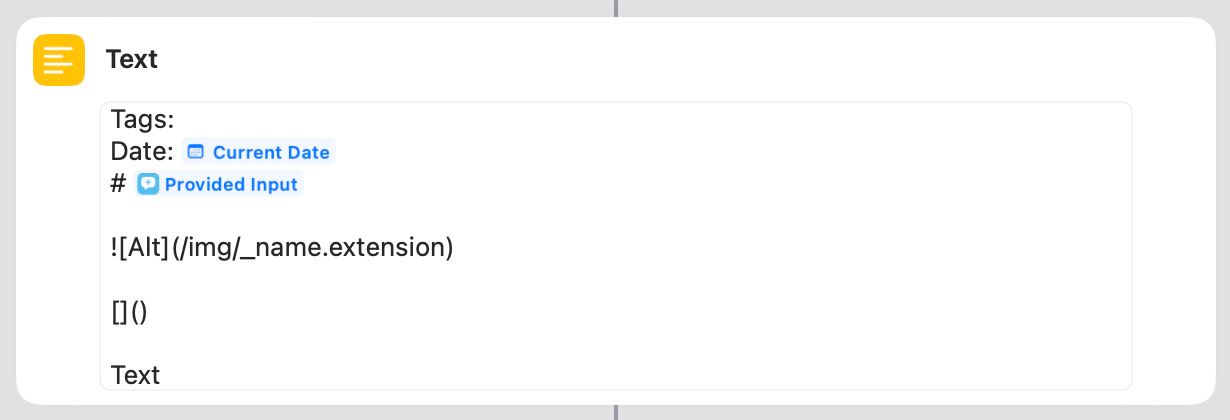
Start with: Tags: and Date:.
To automatically insert the date:
- Right click next to “Date:”
- Click “Insert Variable”
- Click “Current Date”
- Set “Date Format” to “Long”
- Set “Time Format” to “None”
The next line will automatically populate the title that you entered in the prompt above. Start with “#” (an h1) followed by a variable you must set:
- Right click next to “#”
- Hover on “Insert Variable”
- Click “Provided Input”
Then I have a few snippets of Markdown to help me get started including:
for an image I want to share[]()for a link (I always swap the brackets and parentheses accidentally)Textto remind me to include a thought
Now you’ll be ready to start writing instead of first setting up a post.
Name the New Document
Let’s take the post name you entered in the first step and apply to the new text file. This step is a bit finnicky so be careful.
- Search for the “Set Name” action
- Drag the action into your shortcut
- Right click on “Name”
- Hover on “Insert Variable”
- Click “Provided Input”
- Immediately type “.md”
- Click “Show More:
- Deselect “Don’t include File Extension”
Step 6 is important. A blinking cursor appears next to “Provided input” and you need to add the Markdown extension (.md) before clicking elsewhere. Achieving a blinking cursor in this exact spot is difficult to achieve again.
Steps 7 and 8 are also important because the goal is to manually set the file extension as “.md” vs. the default “.txt” which works in Blot but ideally posts use Markdown.

Save the File in Dropbox
Note: I recently updated Dropbox which uses the new macOS File Provider API. I am not sure how this update impacts the Shortcuts and its Dropbox actions.
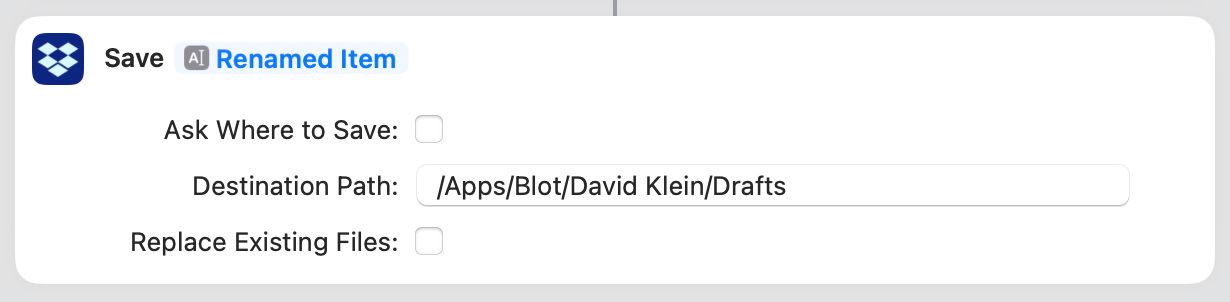
For “Destination Path” enter the location of your Blot Drafts folder. Mine is /Apps/Blot/David Klein/Drafts. Make sure “Ask Where to Save” and “Replace Existing Files” are deselected.
Open Important Folders
As mentioned above, the last step will be dragging and dropping the draft file from the “Drafts” folder into the “Posts” folder when you’re ready to publish. If your post includes an image then you will also need quick access to Blot’s images folder. You can skip this step if you don’t need folders to automatically open.
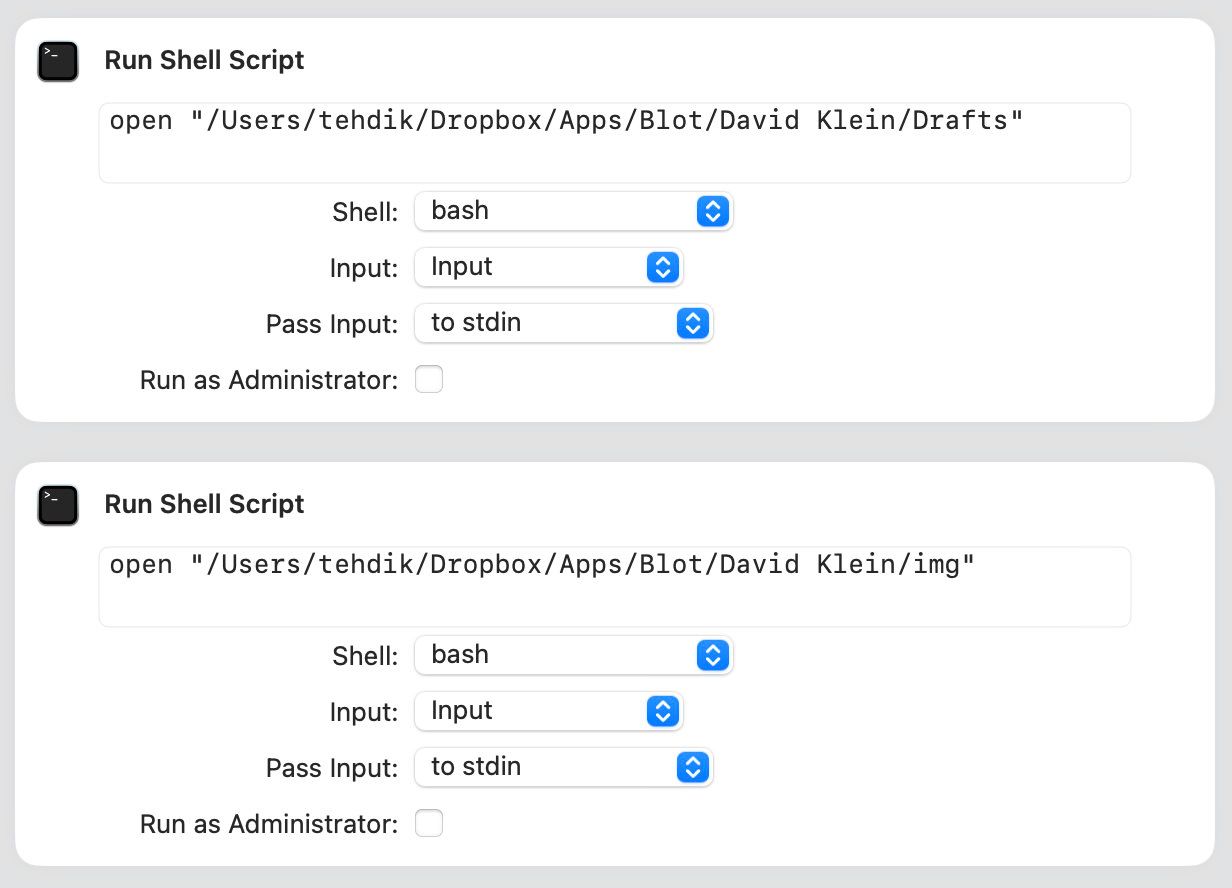
- Search for the “Run Shell Script” action
- Drag the action into your shortcut
- Enter
openalong with the paths for folders that are important to your writing workflow - For “Input” right click on “Saved File” and click “Clear.”
The scripts that I use are:
open "/Users/tehdik/Dropbox/Apps/Blot/David Klein/Drafts"open "/Users/tehdik/Dropbox/Apps/Blot/David Klein/img"
Pause for a Moment
Let’s revisit our original goal here: writing! The text file that was created, populated with helpful text, and saved to Dropbox should automatically open so you can quickly begin writing. It took a lot of experimentation, but I finally discovered that you can’t open this file yet. For some reason the file system doesn’t see it! As a result you need to pause the script for 1 second. Yes, 1 whole second.
- Search for the “Wait” action
- Drag the action into your shortcut
- Set the value to “1”

Note: The screenshot shows 3 seconds, but I continued to experiment after taking the screenshot and discovered that 1 second also works!
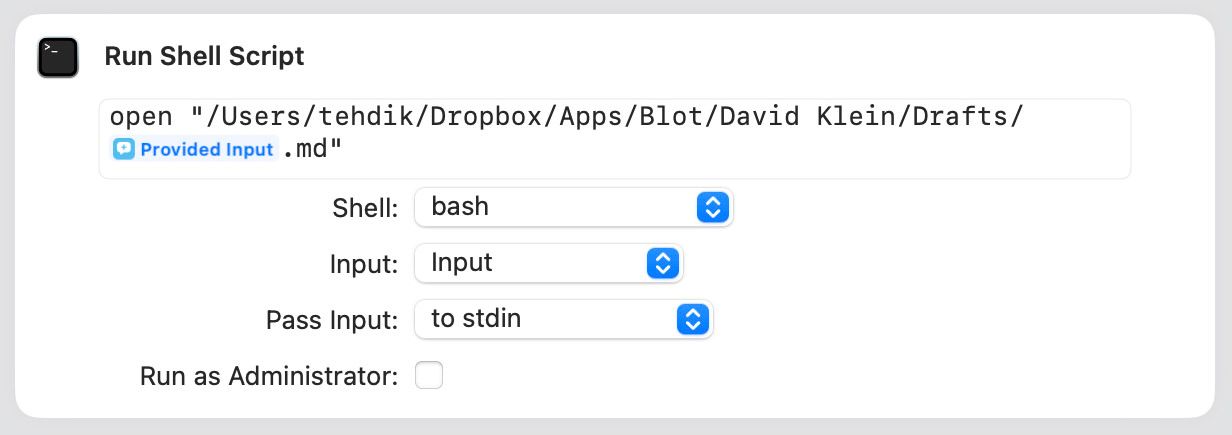
Open Your File
Now it’s time to automatically open your new file.
- Search for the “Run Shell Script” action
- Drag the action into your shortcut
- Enter
openalong with the path for your Drafts folder - Add a
/ - Right click after the slash
- Hover on “Insert Variable”
- Click “Provided Input”
- Add
.md - For “Input” right click on “Saved File” and click “Clear.”
And there you go! Your new file will automatically open. If it opens in an unexpected text editor you can quickly fix that by setting the default application for Markdown files.
- Right click on a Markdown file in the Finder
- Click “Get Info”
- Find the “Open with:” dropdown
- Select the desired text editor
- Click “Change All…”
- Click “Continue” in the popup
Now all of your Markdown files will open the application you selected.
Summary
Shortcuts is unpredictable. If you use Keynote or Things you know what it means for clicks and keystrokes to perform actions that you expect to occur. Shortcuts is different and, as a result, frustrating to use. Several times I had to start over because I got into a state that I did not understand and could not escape. I also spent time trying to use actions to open folders automatically and failed. It seems funny to use shell scripts for a few steps, but that was the most straightforward way to open folders.
The research needed to figure out Shortcuts was mostly done using ChatGPT. It was helpful even when I was unclear about what to click on. I asked clarifying questions nad ChatGPT answered (and apologized)! All of a sudden searching on Google, scrolling results, clicking on a result, interpreting the unique page design, and scanning text for an answer feels antiquated.
Good luck making a shortcut. Let me know how it goes on Twitter 𝕏 Mastodon Threads!