As a collector of Apple products people often ask me, “Do they work?“ To be completely honest I do not track which work and which require repairs. For example, I have not tested my 20th Anniversary Mac yet; I’m just overjoyed to own one. I primarily enjoy the process of researching and acquiring products and the resulting conversations with fellow collectors.
However, I do occasionally feel the urge to explore how I can design a workflow to make an old product work in modern times. The QuickTake 150 is a perfect example since it combines my passion for photography with collecting. After printing my first book last year I thought about how I would expand this year’s book, and one way is relaxing the Ricoh GR IIIx requirement by incorporating additional cameras.
The workflow I devised is one of several possible ways to reinvigorate an old QuickTake. After completing this project I discovered JQuickTake which supposedly allows a modern Mac to communicate with a QuickTake using a combination of cables and adapters. Perhaps someday I will try that method as well. For now, I was thrilled to tinker with an old PowerBook.
Acquire a QuickTake 100 or 150
The QuickTake 100 (the first generation camera) was released in 1994 under Michael Spindler’s tenure as Apple’s CEO. It’s funny to reflect on the years I became acquainted with Apple and began debating its products’ merits with friends on the playground. Sculley, Spindler, Amelio… and no Jobs. The company was a mess and the product lines were scattered (Centris, Quadra, Performa, etc.). But we had Apple computers at school, and I knew they were special.
I would avoid using a QuickTake 200 because of the extra variable of its special data transfer cable that is challenging to find. It also requires a rare SmartMedia card (which coincidentally my 200 had when I acquired it!).
I remember using a QuickTake to document construction progress on NetDay in 1996 at Crocker Middle School. It felt like magic at the time to take a photo, transfer it over a wire, and see it on a screen. Of course now there are no wires and the magic is gone. This is why I enjoy looking to the past.
Fortunately a QuickTake 100 or 150 can be purchased for approximately $100 on eBay or Facebook Marketplace.
Acquire a PowerBook 3400c
There are several challenges when shooting with a QuickTake, and all can be overcome by using an old Mac. First, the camera uses a serial cable for data transfer so you need a serial port. Second, the software used to communicate with the camera only runs on Mac OS 7, 8, and 9. Third, the camera stores photos using the PICT format which can only be converted to modern formats using classic Mac OS software. Lastly, after taking photos, transferring them off of the camera, and converting them to a modern format, the files need to be easily moved to a device that can share them!
Enter the PowerBook 3400c from 1997 with its ability to run Mac OS 9, a built-in serial port, and PCMCIA slots. Each of these features will help you work with the QuickTake. You may recall this particular PowerBook as the laptop Meg Ryan uses in You’ve Got Mail.
Acquire a CompactFlash PCMCIA adapter
You may remember PCMCIA slots used to add a modem or WiFi card to a laptop in the 1990s. For this project a slot will be used for the crucial step of transferring data between a modern Mac and the PowerBook.
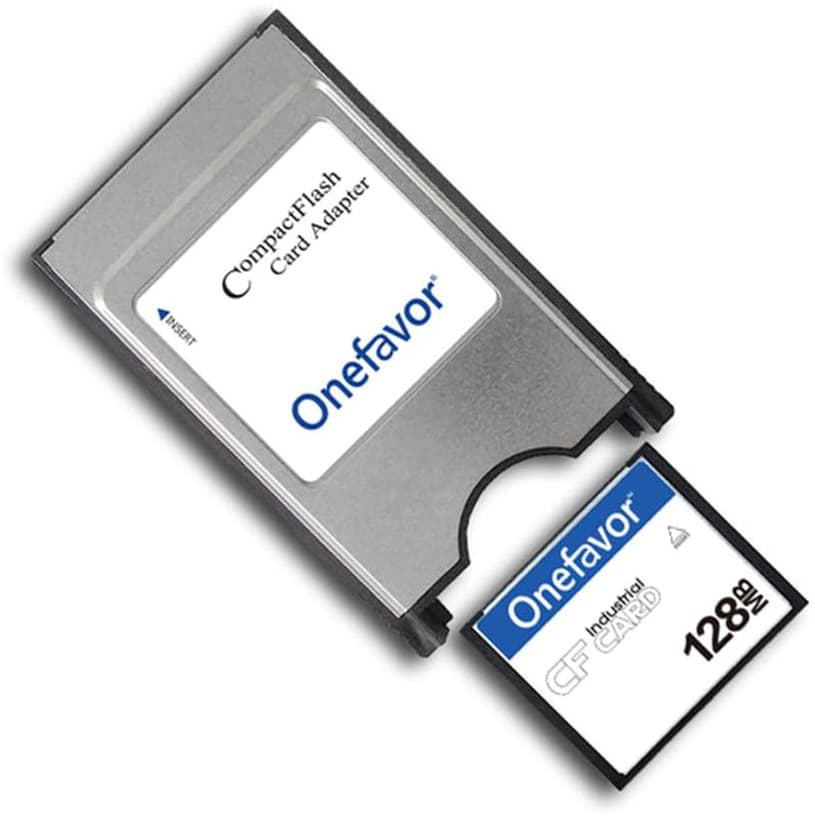
In addition to transferring photos we also need to transfer a few application installer files to the PowerBook. It’s very important to note that you must use a real CompactFlash card and not a CompactFlash card that houses an SD card. I started with that and it refused to fit into the PCMCIA card which was quite frustrating.
Acquire a SanDisk CompactFlash reader
To connect a CompactFlash card to the modern Mac (in this case I’m using a M1 MacBook Pro) we need an external card reader with USB-C.
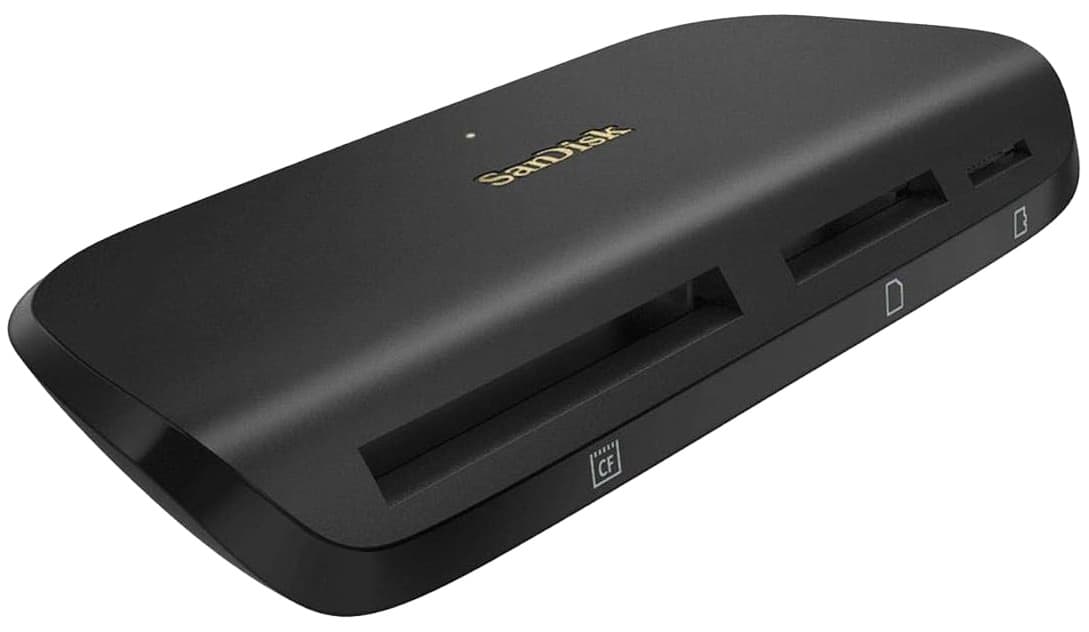
I’m a long-time customer of SanDisk, and I was delighted to find an affordable, elegant solution.
Connect the reader to the modern Mac
Also insert the CompactFlash card that was included with the PCMCIA card into the reader.
Format the CompactFlash card
To ensure the CompactFlash card can be read on both the modern Mac and the PowerBook, use Disk Utility to format the card as “MS-DOS (FAT)” with Scheme “Master Boot Record.”
Download application installer files
Both installer files will be .sit format meaning you get to use StuffIt Expander to uncompress them on the PowerBook. Are you having fun because I certainly am.
- Download the GraphicConverter 5.9.5 installer and drag it onto CompactFlash card. This is required to convert the QuickTake’s photos into a modern format. Reminder: Converting formats can only be done on the PowerBook.*
- Download the QuickTake software installer and drag it onto the CompactFlash card.
Note: This is Dave from the future and I may have found another way to convert formats. We’ll get to that soon.
Eject the CompactFlash card
Can you believe dragging to the trash can is still one way to eject external devices? Also the “Macintosh” wallpaper option in macOS Sequoia is just delightful.
Slide the CompactFlash card into the PCMCIA adapter in the PowerBook
Remember when computers had moving parts and physical media? Quaint.
Pause
Let’s just take a moment to pause and reflect on the aesthetics of Classic Mac OS. The colors, typeface, Control Strip, etc. It’s all lovely even at its paltry 800×600 resolution.
Drag the installer files onto the Macintosh HD folder
One detail I forgot about Classic Mac OS is dragging files from external disk onto the Desktop does not copy the files. You must drag the files into a folder before the “Copy to” dialog appears.
Double click the .sit files to uncompress them
Welcome back, Aladdin Systems.
Launch the QuickTake 150 installer
The disk image that was just uncompressed includes installers for the QuickTake 100, 150, and 200. If you have a 150 like I do then launch the 150 installer.
Easy install
Just leave everything as is and click the Install button.
Installer installs the install disks
This only takes a minute. Notice in the screenshot that the current step is “Writing QuickTime PowerPlug.” When I tried this step on a slightly more modern iBook G4 in the Classic environment I ran into a problem with QuickTime PowerPlug. I kept seeing errors that it was already installed, and I could not figure out a way around the error. I even toyed with disabling and removing its extension without success. That frustration reassured me that the 3400c was the best path.
Launch QuickTake Image Access
After successfully installing the QuickTake software and GraphicConverter, go to the Apple menu, hover over Control Panels, and click on QuickTake Image Access. Yes, it is confusing that the QuickTake software is accessed through Control Panels instead of double clicking on an application in the Applications folder.
Insert AA batteries into the QuickTake
A side door opens to reveal a bay for batteries. The photo of 2 AA batteries is deceiving because deep in the bay is a spot for a third battery. The batteries are also not perfectly aligned; each is placed at a slightly different angle which I find comical.
Slide open the lens cover and shoot
No power button. No switch. The lens cover is used to power on the camera. My gut reaction to this behavior was, “Oh I suppose that’s clever.” However after using the camera for a bit this design became frustrating. The camera automatically powers off after a few minutes if idle which means you have to close and reopen the lens cover to use the camera again. It is not a smooth mechanism nor is it easy to grip. My finger slides off of the grooves more often than I would like. If you look closely at the animated gif above I use multiple fingers to ensure the cover opens on the first attempt.
With batteries and an open lens cover you’re ready to shoot! Enjoy pressing what may be the largest shutter button in the history of digital cameras.
Connect the QuickTake to the PowerBook
After you’ve snapped a few photos connect the QuickTake to the PowerBook’s serial port using the cable that was included with the camera. Ensure that you slid open the lens cover within the last couple of minutes so the camera is powered on and ready to communicate with the computer.
Click “Connect to Camera” in QuickTake Image Access
A couple seconds later the Connect to Camera will appear disabled, the Camera Name field will be populated, and the camera will mount on the desktop just like a disk. This is all extremely intuitive.
Double click on the camera’s disk image
There are your photos! Don’t get too excited. We still need to convert them into a more useful format.
Launch GraphicConverter
Double click on Macintosh HD. There you will find the GraphicConverter folder that we installed. Open it and double click on the GraphicConverter app icon.
Alright, team. It’s time for a confession. I had this all working beautifully on my PowerBook 3400c. When it came time to document the workflow something happened to the laptop. When I launch applications I now get error type 1 or 2. Remember those? I sure forgot. I tried everything I could think of to resolve the errors. Fortunately a friend provided an alternative: SheepShaver. This software allows me to run Classic Mac OS on a modern Mac and convert the files. Unfortunately it cannot communicate with the camera, but at least I documented those steps before the PowerBook got into its bad state.
File → Save as
In the Save dialog select your CompactFlash card as the save destination and select JPEG as the format.
File → Save as → Options
If you want to get fancy click on “Options” in the Save dialog to choose the JPEG quality and see a preview.
Photoshop 4.0
And if you want to get even fancier try downloading and installing Adobe Photoshop 4.0 to tinker with your photos like it’s 1996.
Eject the CompactFlash card
Again, it’s wild that the user experience of dragging a mounted drive to the trash can to eject it is still used in 2025. Also I was pleasantly surprised to hear and see the PCMCIA card pop out of the slot.
Enjoy your photos
Insert the CompactFlash card into the SanDisk reader and transfer your photos to the modern Mac. Let’s take a look at some unedited photos I took with the limited 640×480 resolution.
Interior shots are quite dark.
Standing next to a window helps.
Outdoor light is clearly ideal.
Of course I must include a shot of the 3400c. The flash is brutal.
A fun side effect of purchasing a used QuickTake is discovering the previous owners’ photos still stored on the camera. Clearly someone who owned this particular camera was a fellow collector.
Closing platinum thoughts
I am clearly a fan of Apple and its products. I attended Macworld conferences in middle school, sold Macs at Computerware in high school, led the Mac User Group in college, interned at Infinite Loop, and sold stacks of iPhones at the Palo Alto store after graduating. Somehow I never noticed until writing this post that the Platinum design language was incorporated outside of the user interface. Take a close look at the top of the Graphic Converter About window below.
Do you see the horizontal bars at the top of the window? The bars feel like they are sticking out of the window by creating tiny shadows. As a user you feel encouraged to grab that area with the mouse and drag it around the screen. Well take a look at the QuickTake’s AC adapter.
Look at that! The bars are grooves in the AC Adapter instead of bars that protrude to create shadows, but it feels like a direct connection to the operating system’s design. I can’t believe it!
Thank you for joining me on this hardware odyssey, and I hope you feel inspired to purchase some vintage Apple products.
Chat about this?
Send a comment