Upgrading to a Ubiquiti Network
TL;DR
I upgraded from an Asus mesh networking setup to a Ubiquiti setup with access points wired directly to a router via ethernet. As a result the network’s speed, latency, and reliability dramatically improved. My computers also now use ethernet instead of WiFi to ensure maximum speed.
Ubiquiti hardware and software are both robust and simple. If have an opportunity to install ethernet cables in your home, go for it.
For years I have dreamt of living in a home riddled with ethernet cables. In November of last year that dream became a reality when my family moved into a house that has ethernet ports in most rooms. I could finally let go of WiFi when working and maximize both speed and reliability. Yes, I have tried mesh networking products like the Eero suite and a set of Asus ZenWiFi AX6600s. Wired will always beat wireless.
I quickly encountered a mystery because I could not find where the cables terminated. Eventually my brother in law noticed a small panel in a random closet. He popped it open and a dozen cat 5e cables fell out. I was giddy until I noticed that there was no jacks on the cables. Project! I acquired a Brileine RJ45 crimp tool, a bag of jacks, and painstankingly connected each cable to a jack. The next step was to figure out which cable went to which room since the cables were not labeled.
Another mystery arose since the Brileine RJ45 network cable tester I purchased failed to detect any signal traversing the cables. I removed a wall plate and discovered that the cables were not connected to keystones on the other side! This project went from peculiar to maddening.
After watching some YouTube videos and purchasing a Leviton palm termination tool and a TRENDnet punch down tool, I decided to reduce my anxiety and save time by hiring Bay Area Tech Hero to come connect the wires to Leviton Cat 6 QuickPort connectors. The cables worked and I was all set with my existing Asus access points.
Or was I? The true catalyst for this project was actually my brother in law’s generous Christmas gift of a stack of Ubiquiti products. Yes, he gets me. Let’s walk through the new setup.
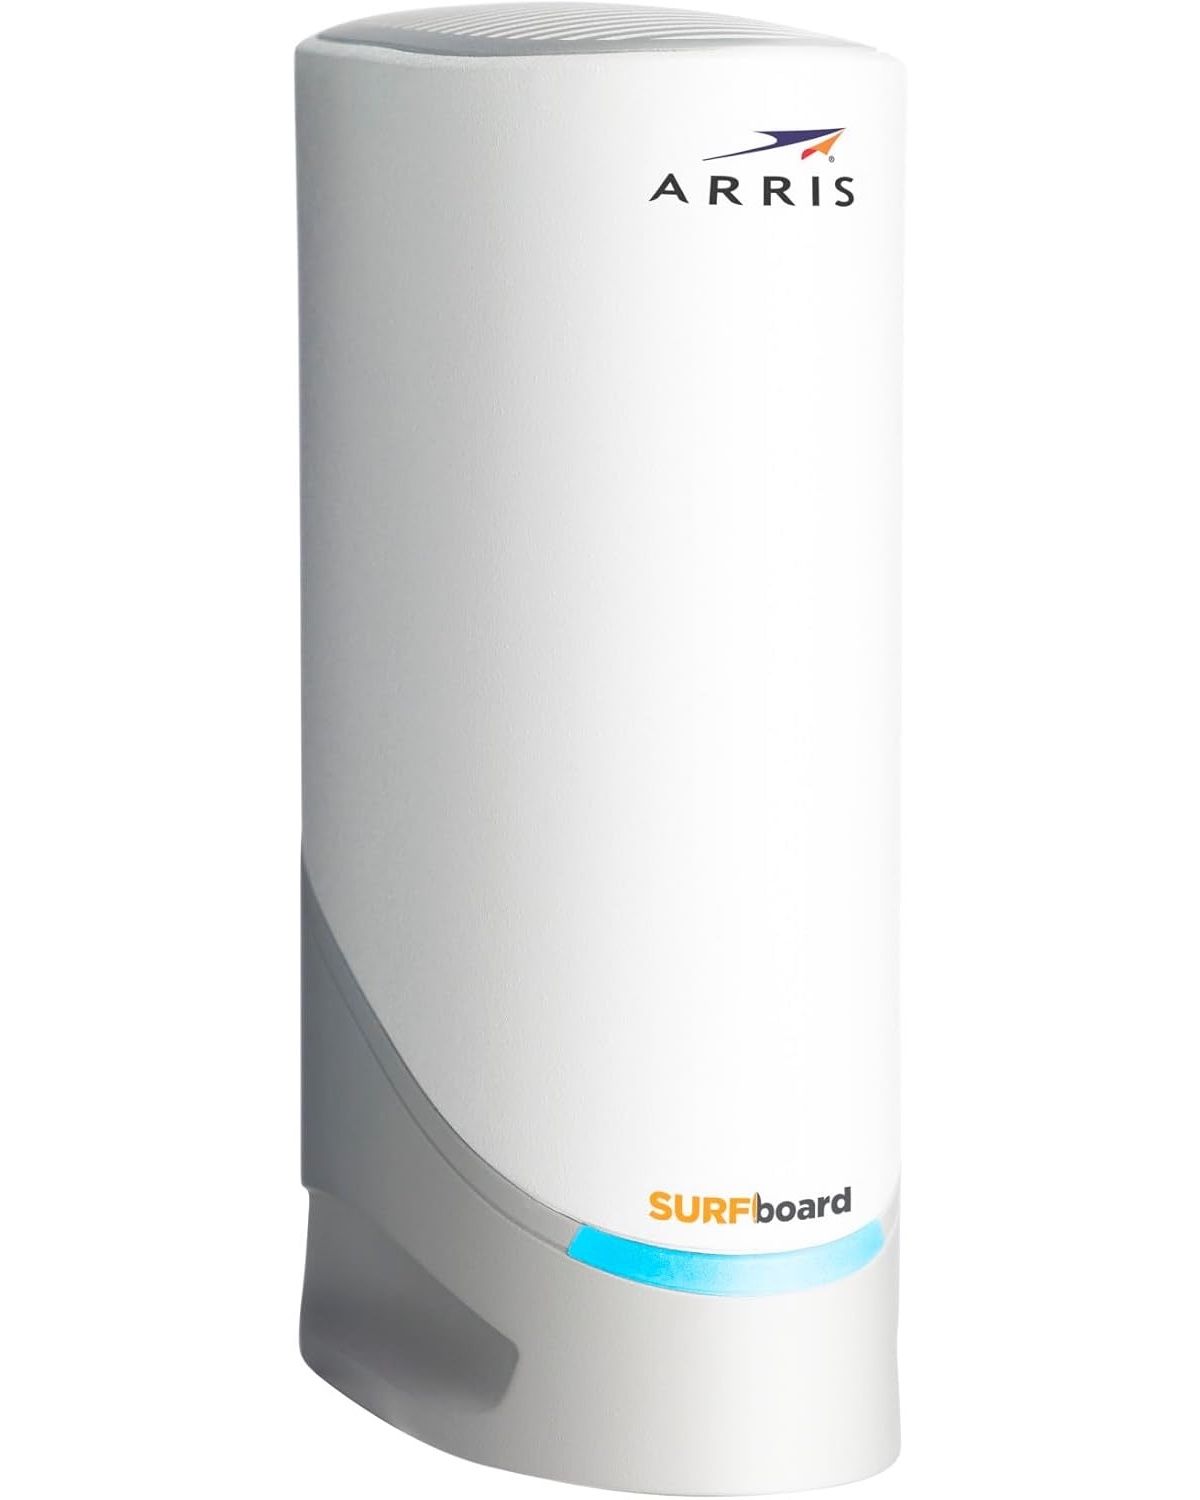
Cable modem
First, I upgraded my cable modem to an Arris S33. When I called Comcast to provide its MAC address the tech support representative was impressed by this choice. Also it’s neat how cable modems are only 5 inches tall nowadays.
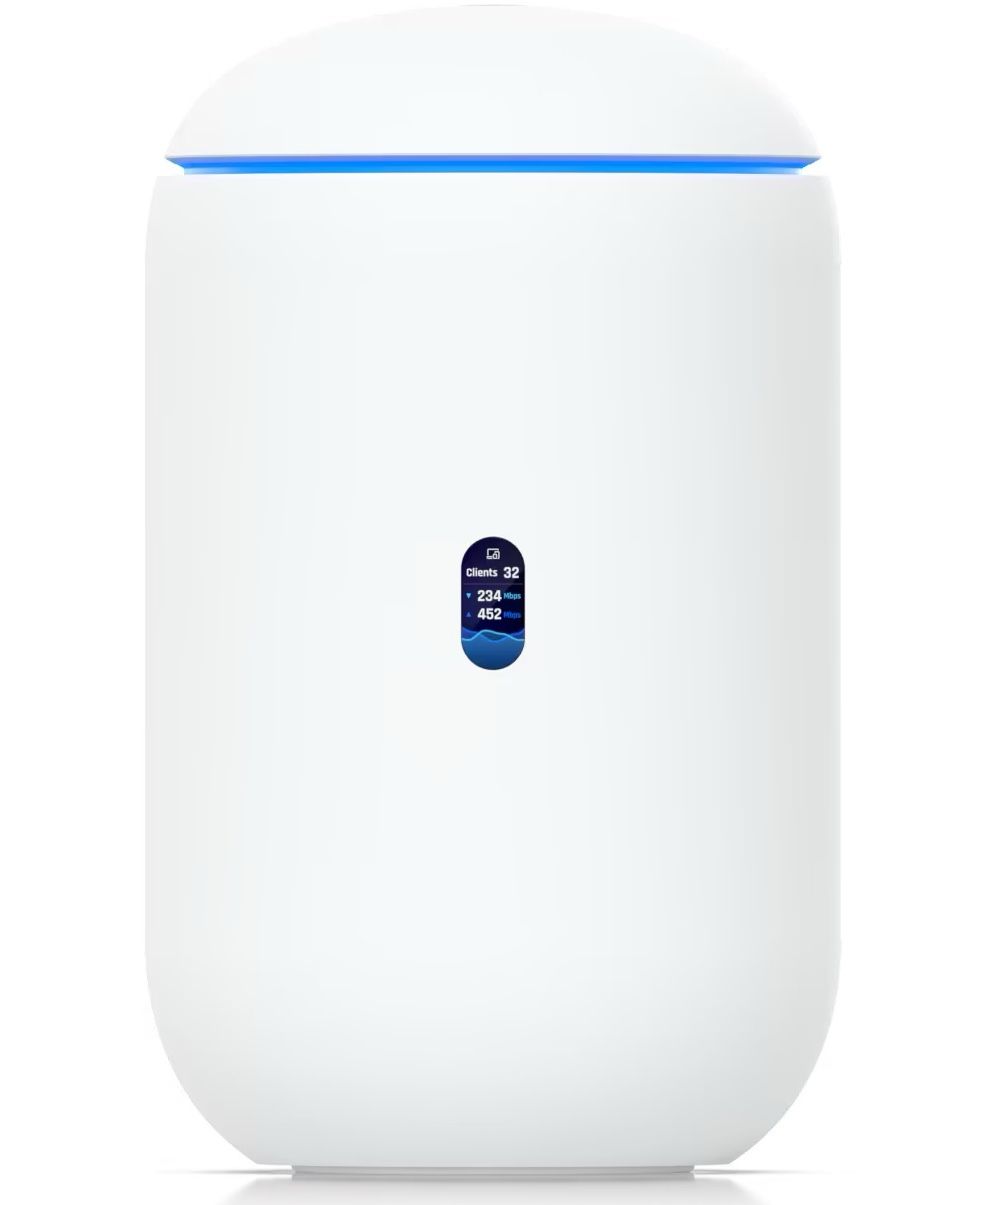
Router (“Gateway” according to Ubiquiti)
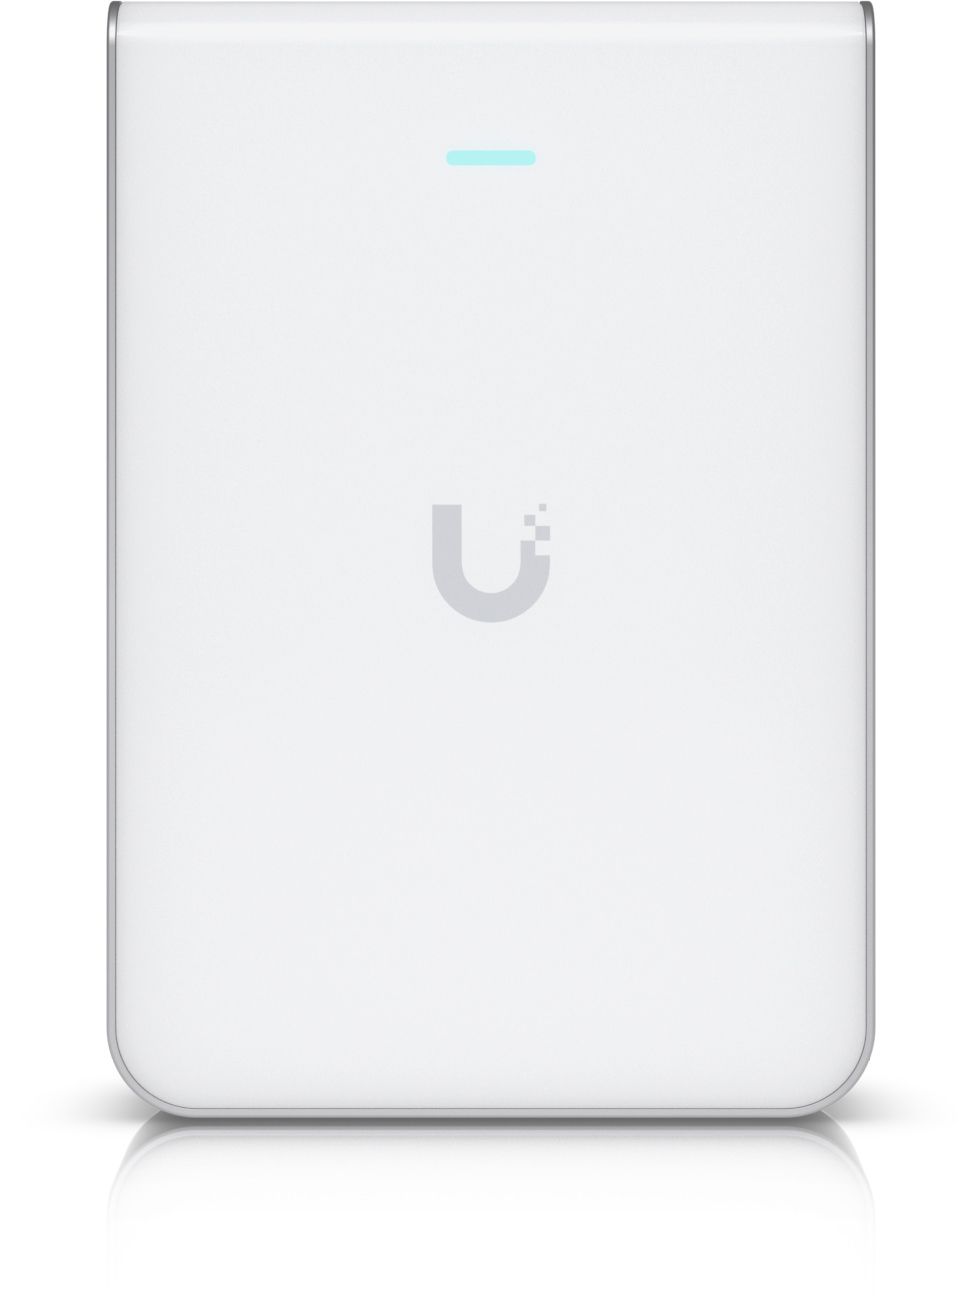
The most important product in the setup is the router and I selected a Ubiquiti Dream Router 7. Yes, 7 as in WiFi 7 which as of April 2025 is only available in two Apple products: the iPhone 16 and 16 Pro. The Dream Router also acts as Ubiquiti’s “gateway” which allows one to monitor and manage the network and Ubiquiti products like access points, switches, cameras, etc. Two of the router’s four ethernet ports are wired to the jacks next to my and my wife’s desks allowing us to connect our laptops directly to the router.
Dream unlocked.
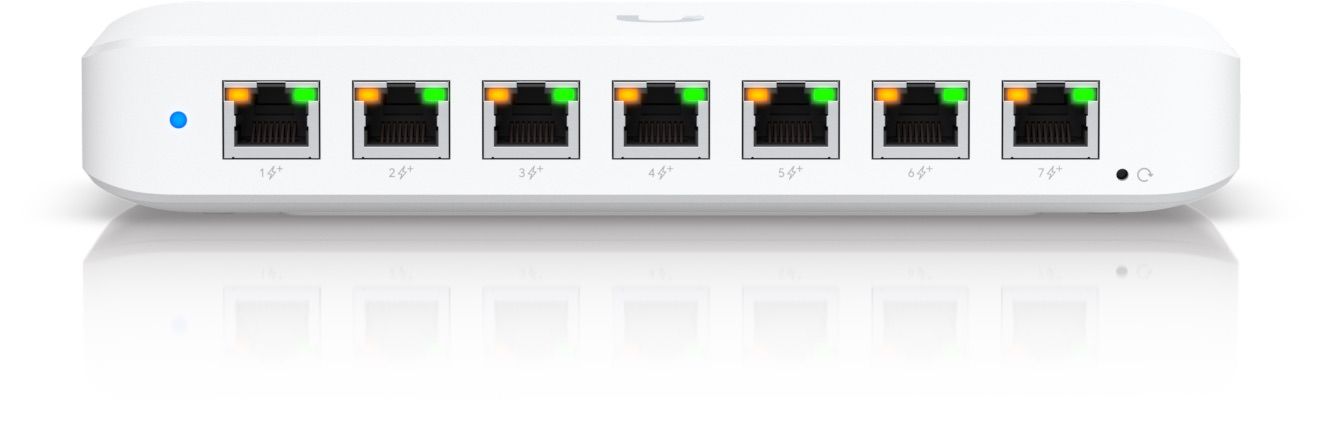
Switch
The Dream Router 7 does not support power over ethernet, so I purchased a switch that supports PoE to sit between the access points and the router. Enter the Ultra 60W. It’s small, wall-mountable, and fast. I have 3 access points and a Sonos Port wired to it. Perhaps someday I’ll connect a Canon PRO 310 printer, but that’s for another blog post.
Access points
In addition to the Dream Router’s WiFi signal I acquired access points for the family room, the kitchen, and the primary bedroom. Each is mounted over spots where the previous owner had installed plates with ethernet and coax ports. As a result my house is now overrun with WiFi 7.
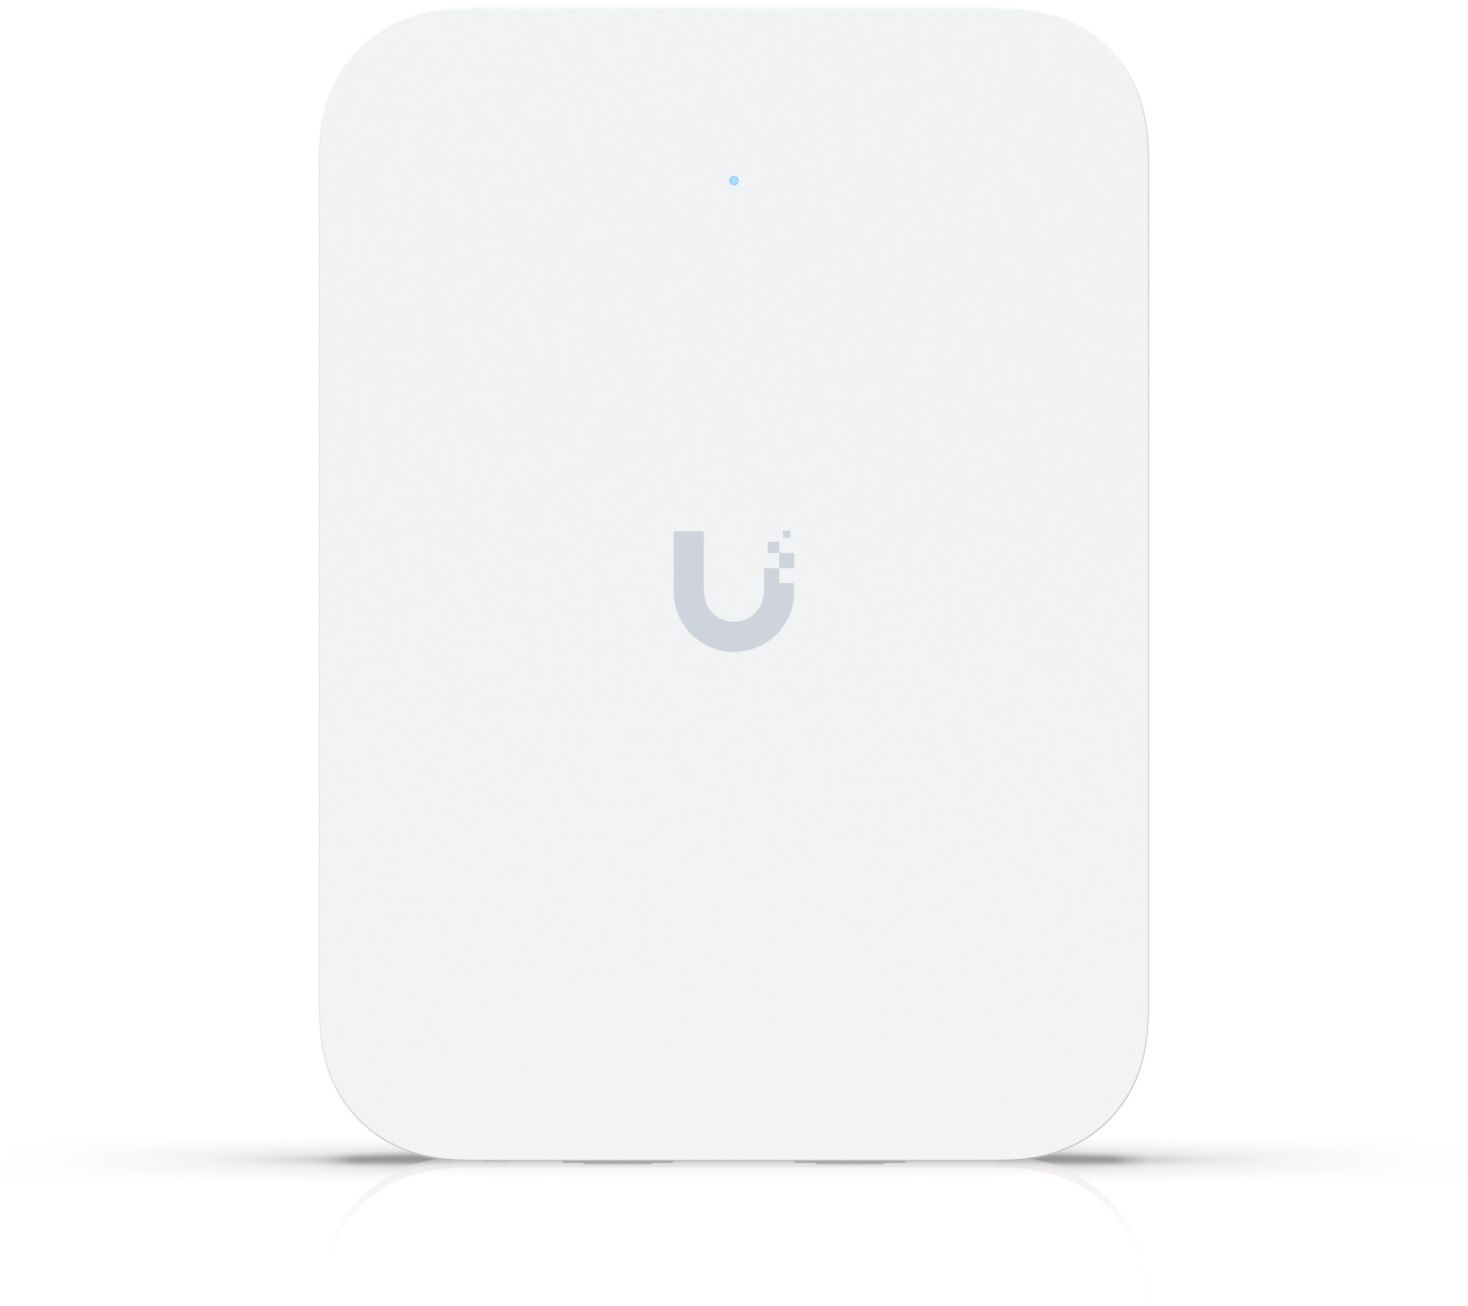
Just for fun I sprang for a “pro” model for the primary bedroom. It’s a bit larger and less elegant than the in-wall version, but no one will know since it’s hidden behind a bed.
Software
Starting in approximately 2003 I believe my journey with WiFi routers is as follows:
- Linksys WRT54G (the OG)
- AirPort Extreme
- AirPort Time Capsule
- eero Pro (2nd generation) + Beacons
- Asus ZenWiFi AX6600
Each product had its delightful moments. For example, the Linksys could be upgraded to OpenWRT for extra capabilities. It also supported UPnP for remotely accessing IP cameras and streaming cable TV using the original Slingbox. Each also had its quarks with setup and management. Some relied on clunky web apps, Apple naturally built an elegant macOS app, and both eero and Asus leaned in to the modern age with iOS apps. However none were as powerful or beautiful as Ubiquiti’s web and iOS apps.
iOS apps
Yes, apps. Plural. Ubiquiti makes a suite of apps for managing its various product families. For my purposes I focus on 3: UniFi, Portal, and WiFiman.
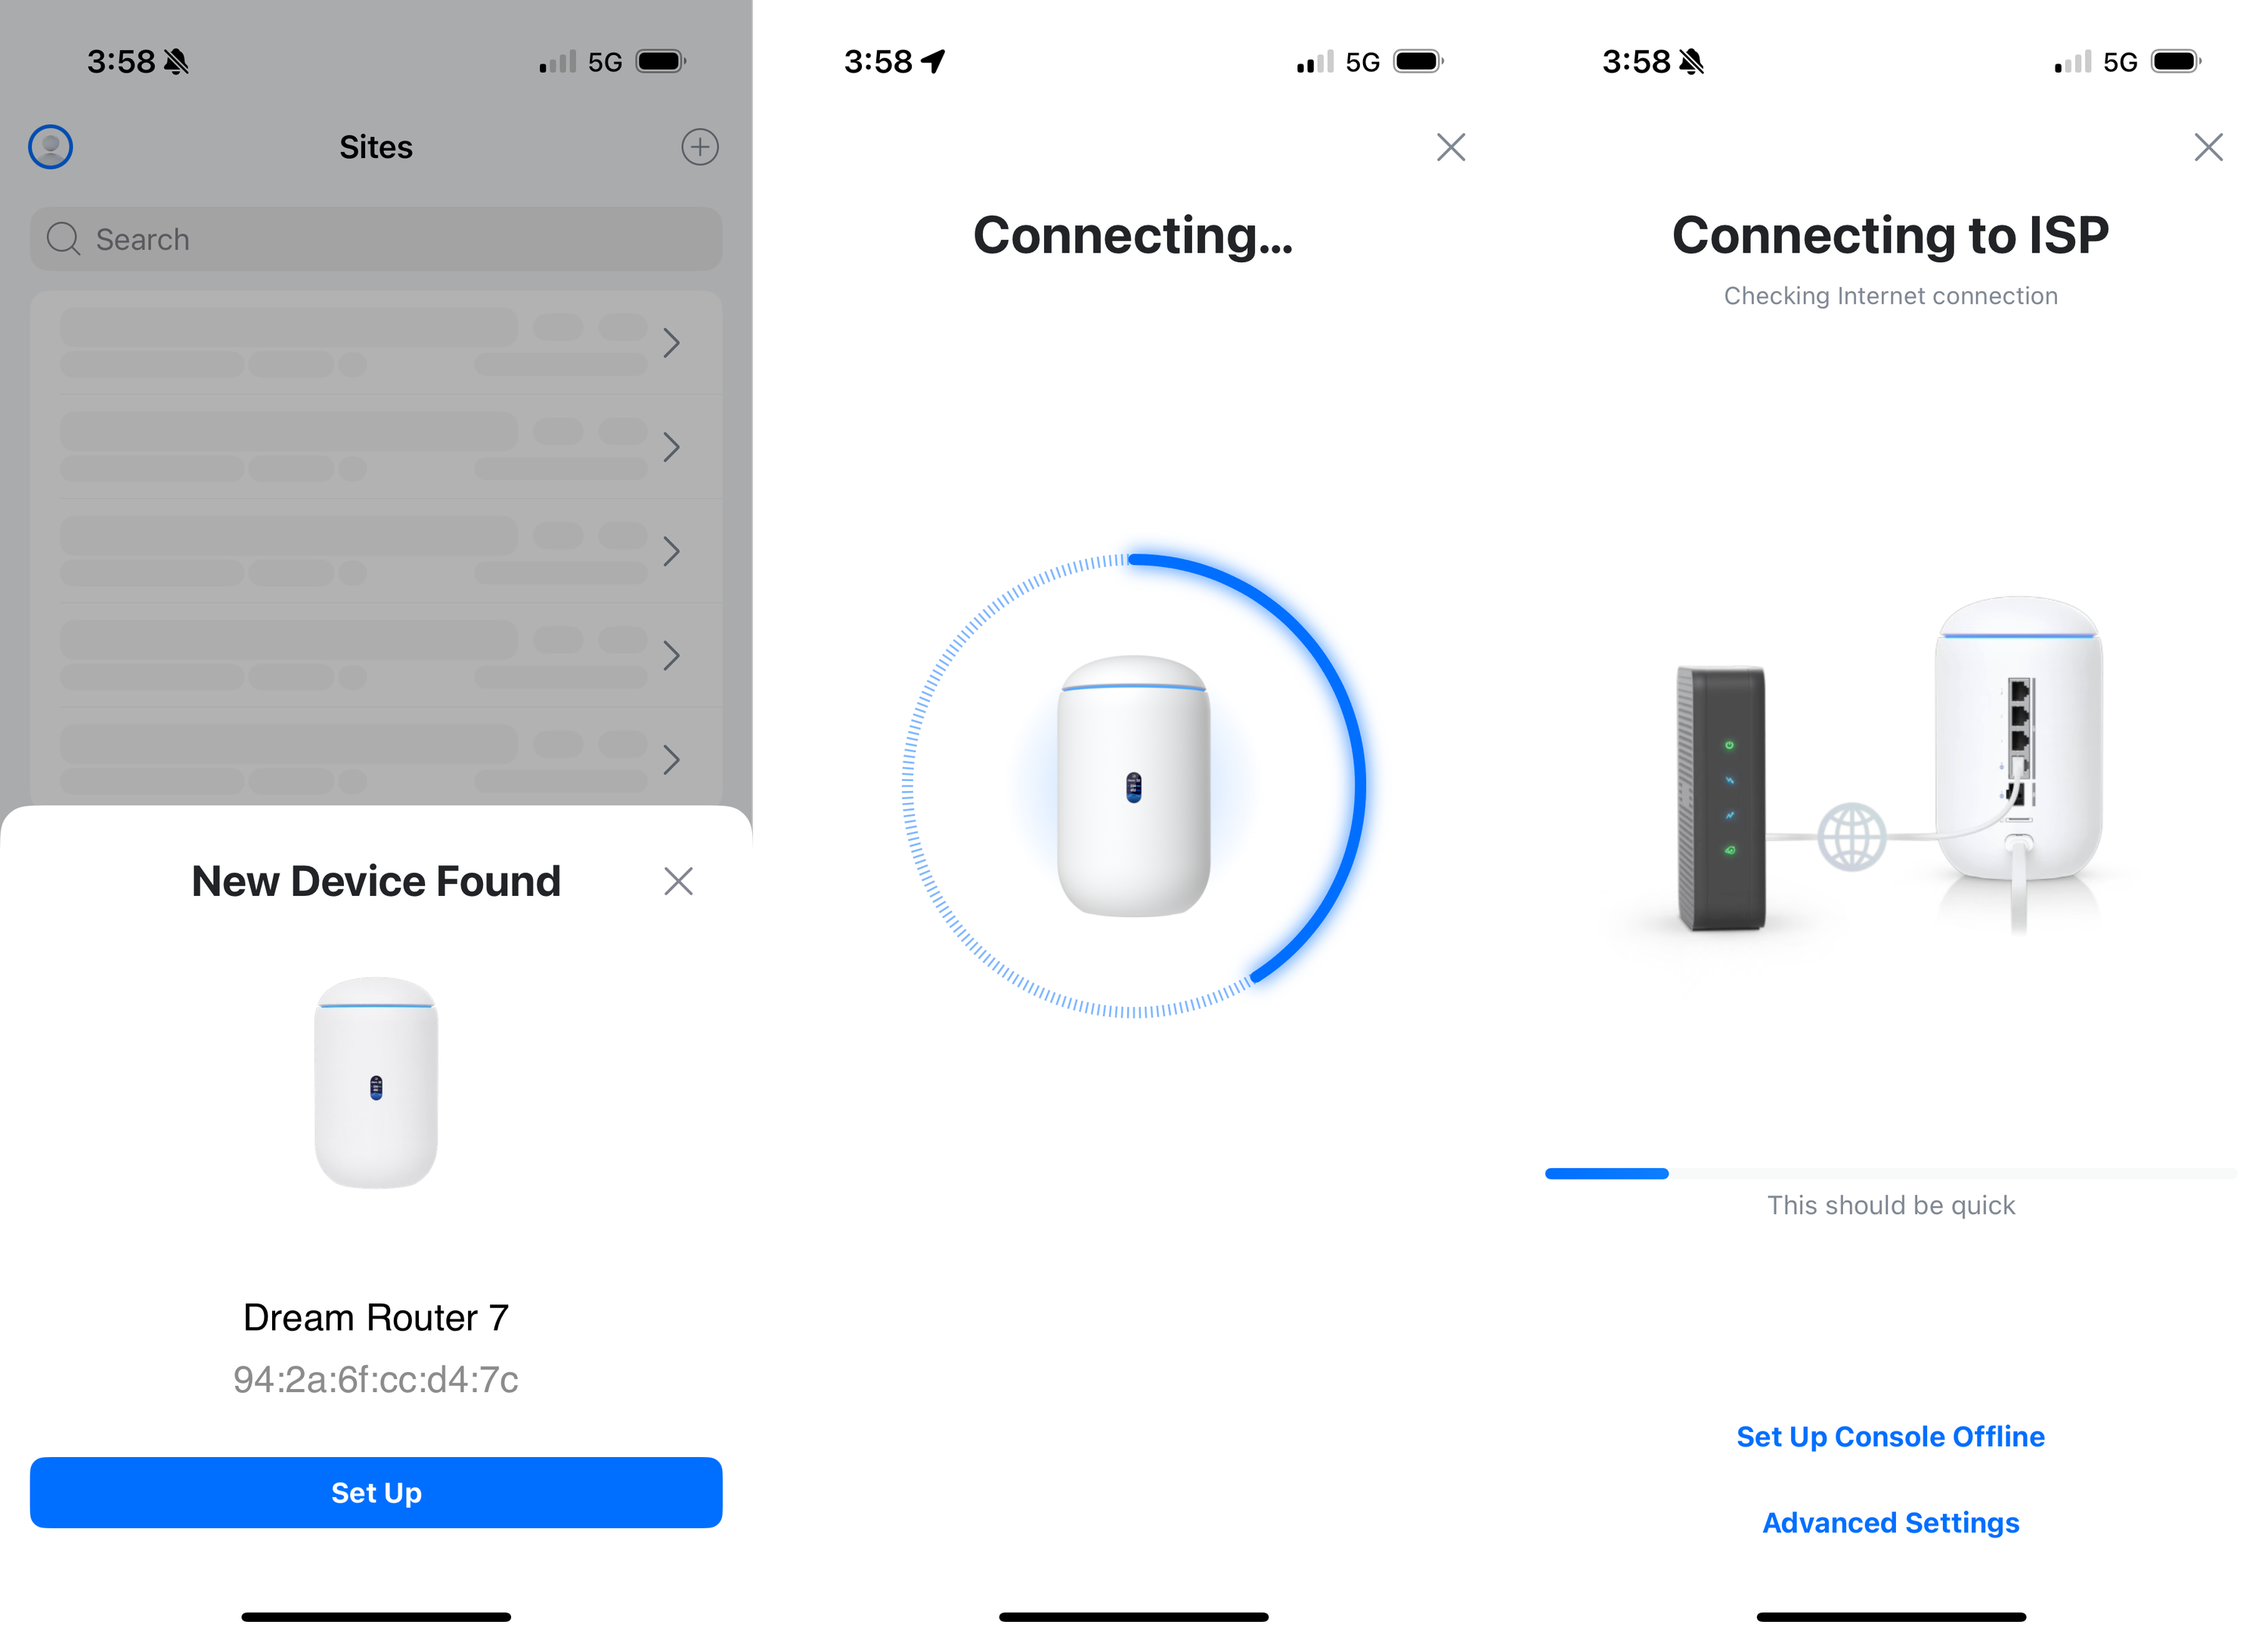
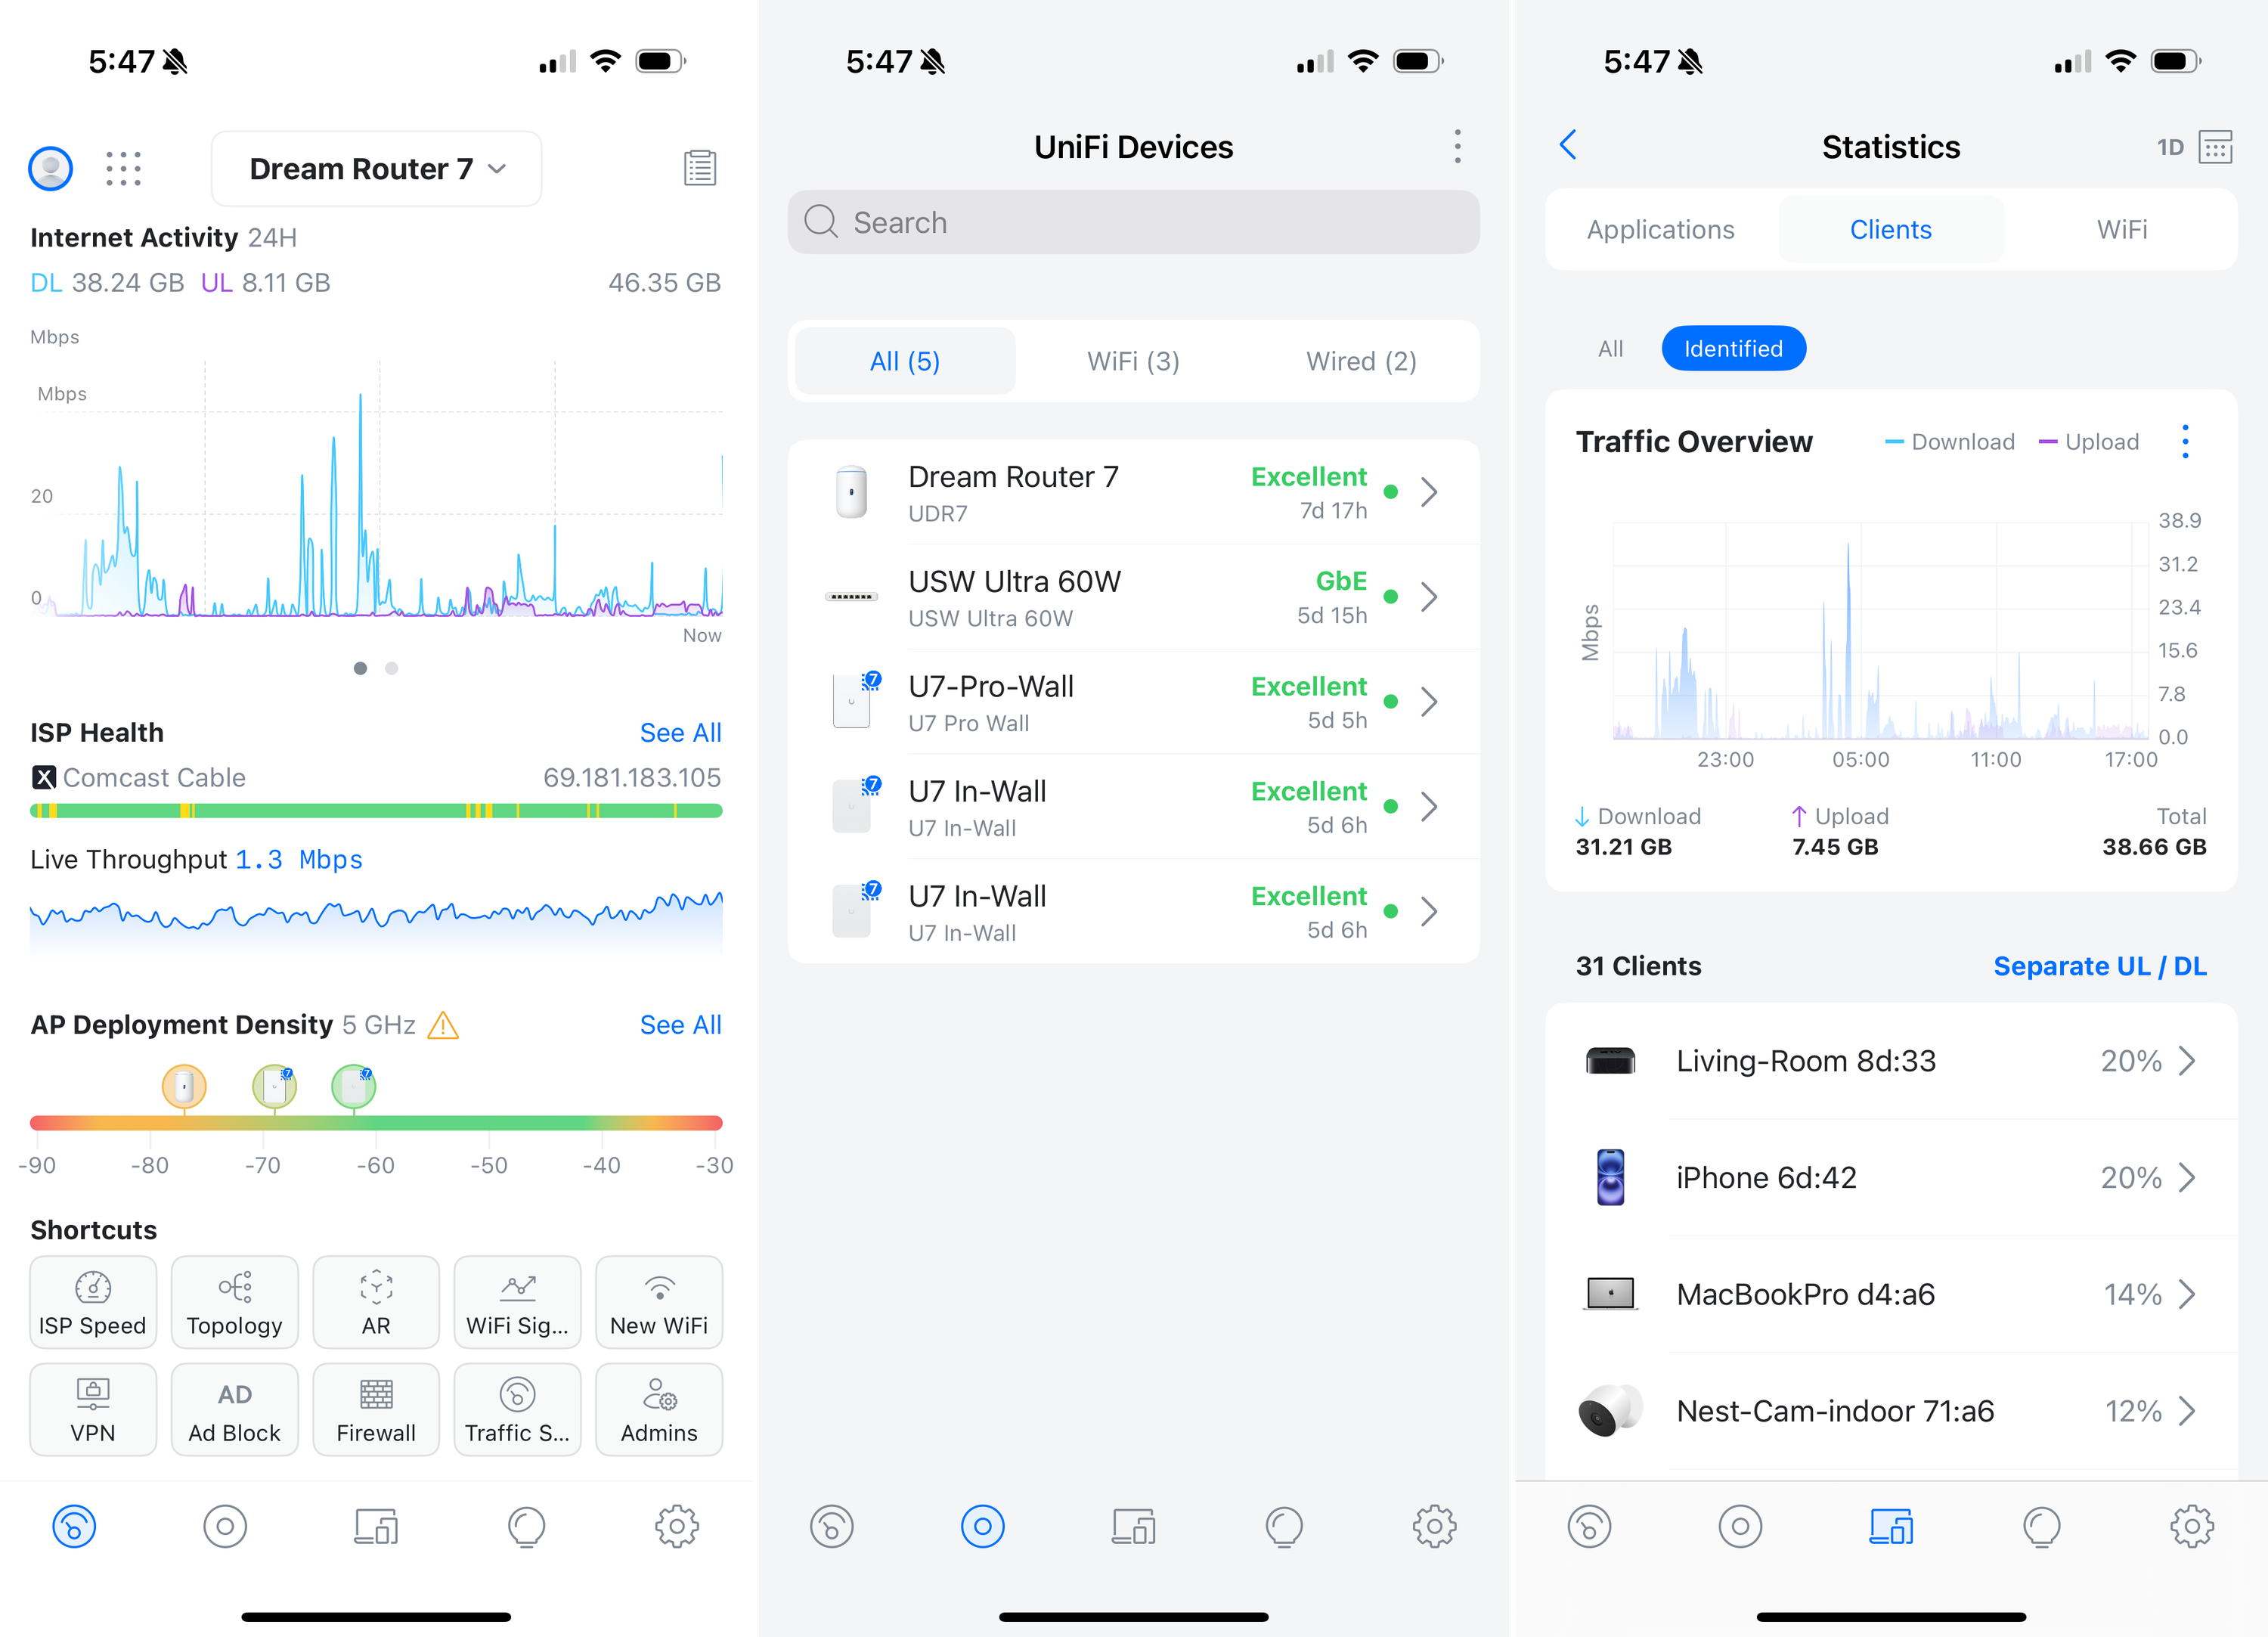
UniFi is where you start and end as it’s used for both installation and management. Once the router (“gateway”) is configured the other products automatically appear alongside a simple “adopt” button. A few seconds later my switch and access points recieved updated firmware and were broadcasting the network. This was beyond enjoyable for its simplicity and clarity. Previous systems required adding products indivdiually through laborious flows that required selecting a product family, selecting a device, waiting on a “searching…” stage, etc. Ubiquiti simplified this flow into a few obvious button taps.
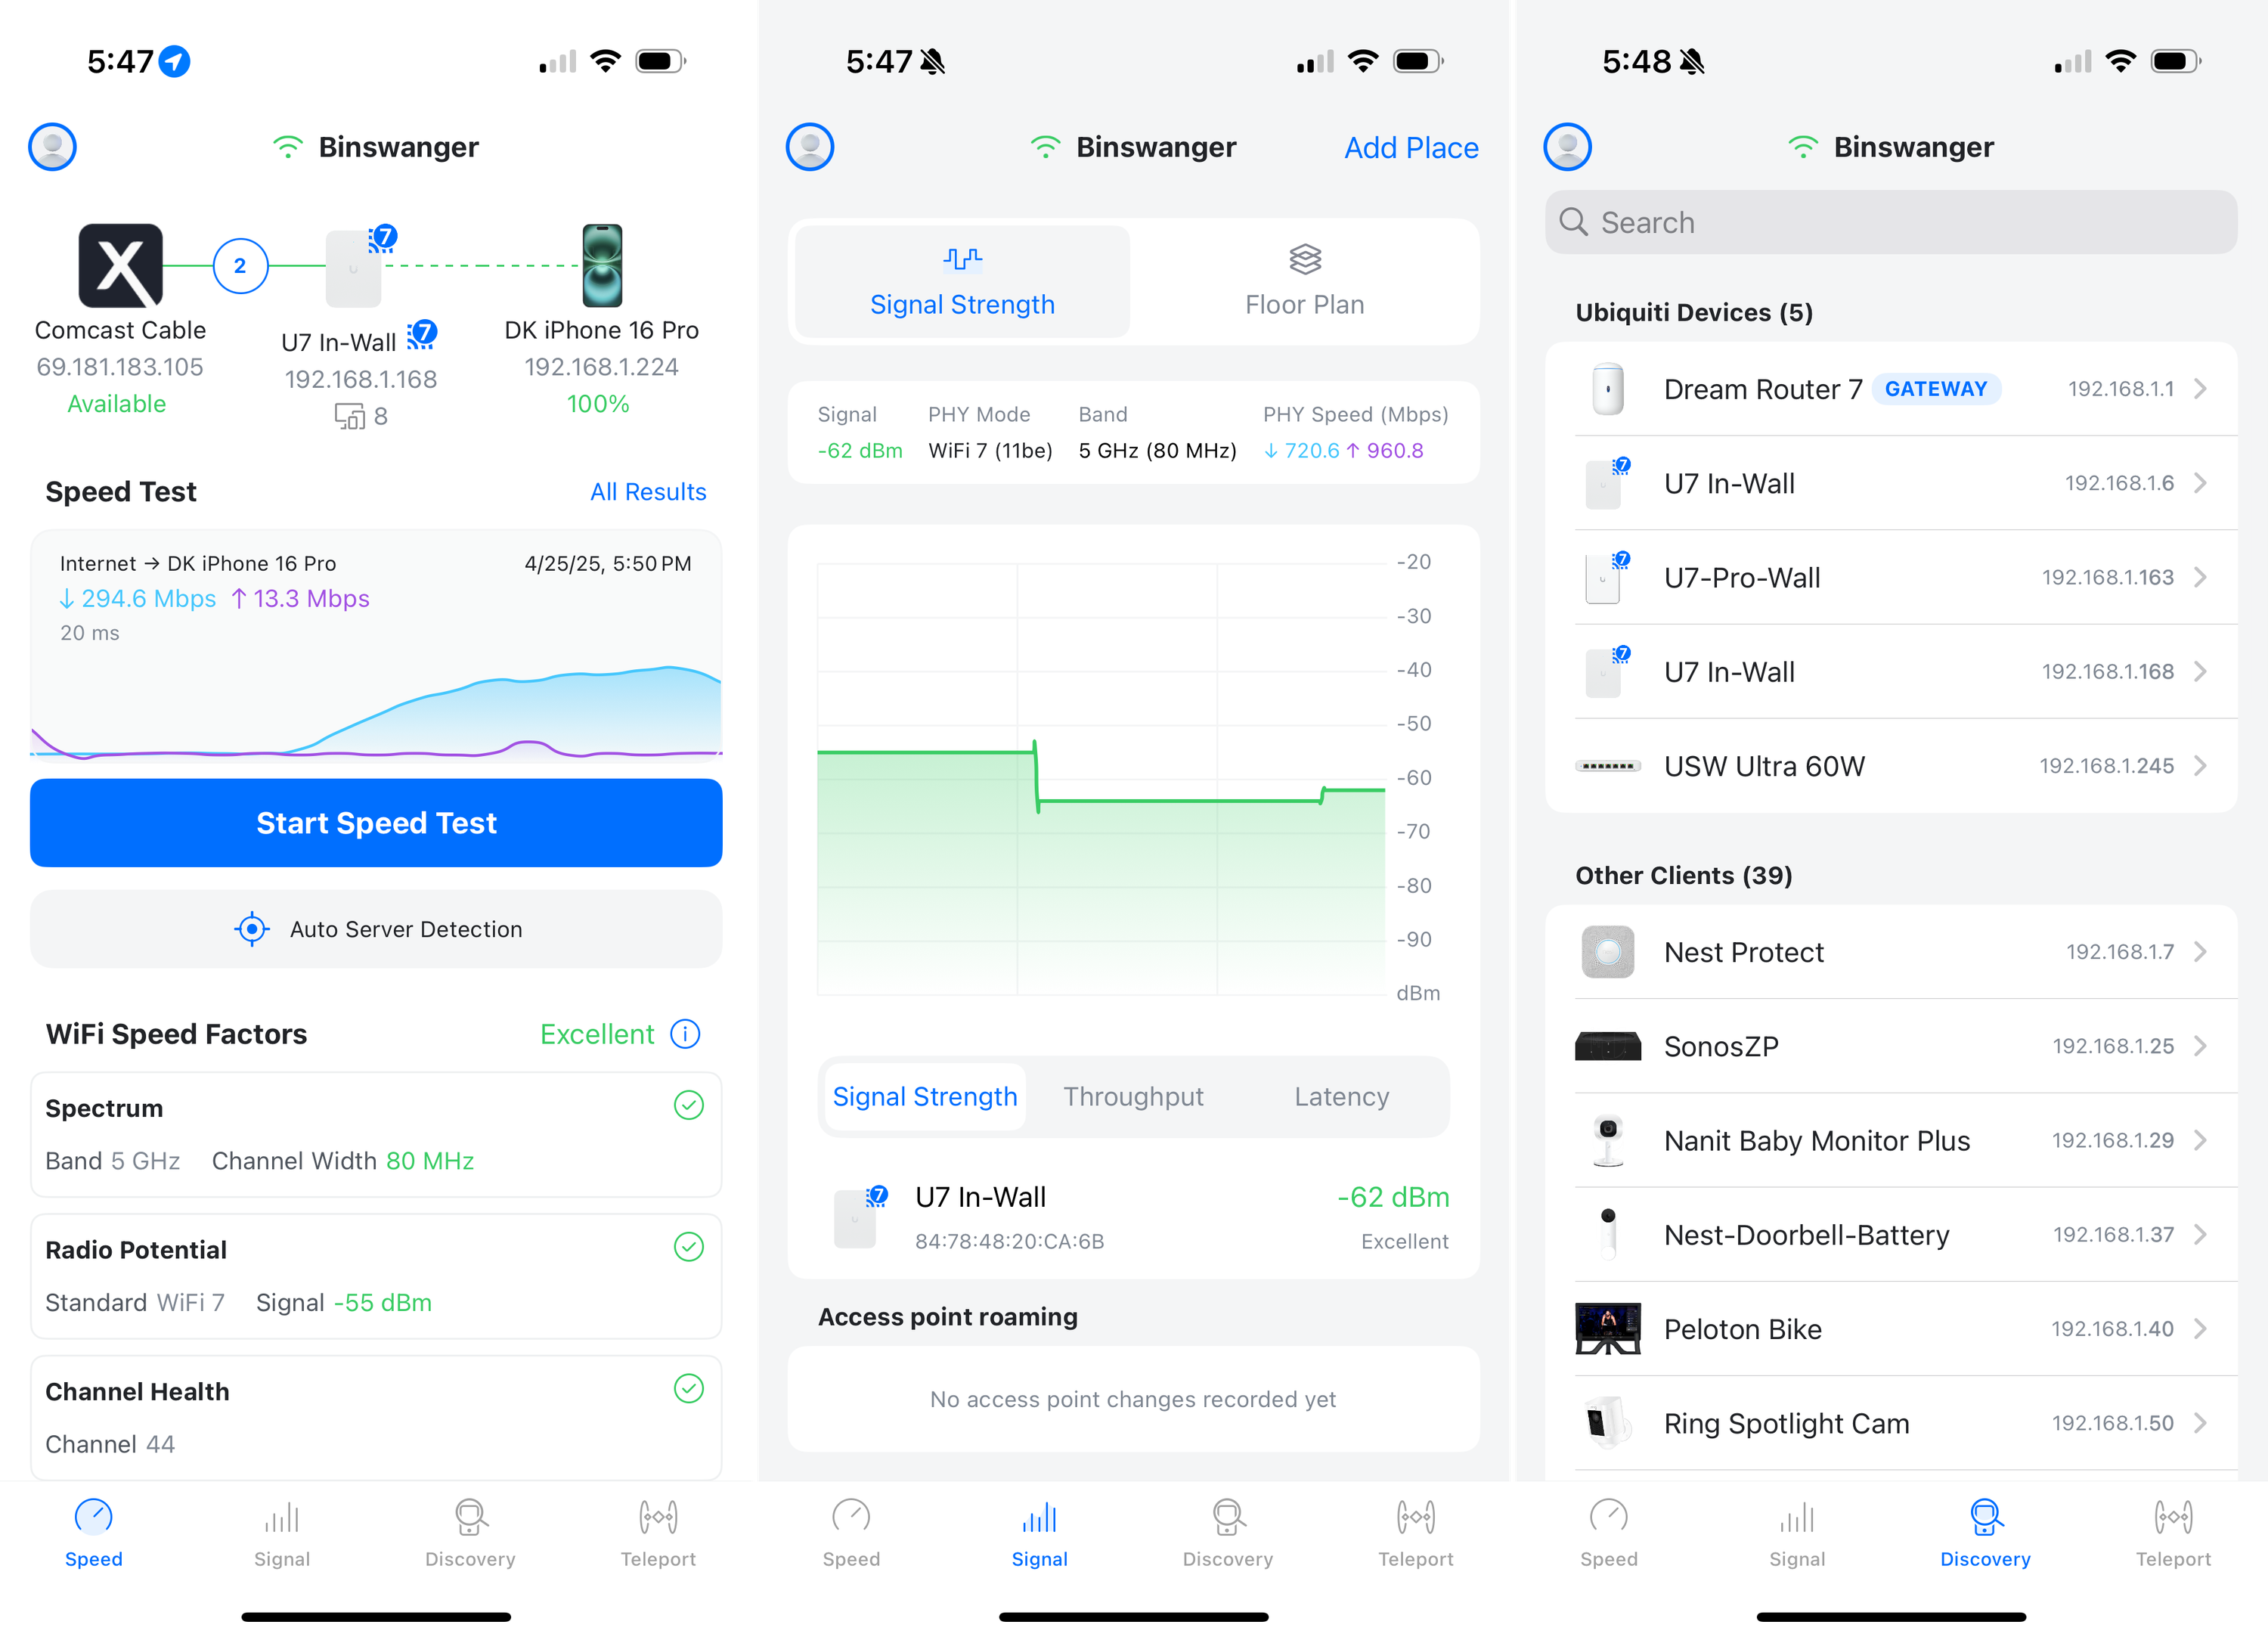
WiFiman is Ubiquiti’s version of Speedtest.net or fast.com, but with a few extra fun features like analyzing signal strengths and the ability to “teleport” into your home network.
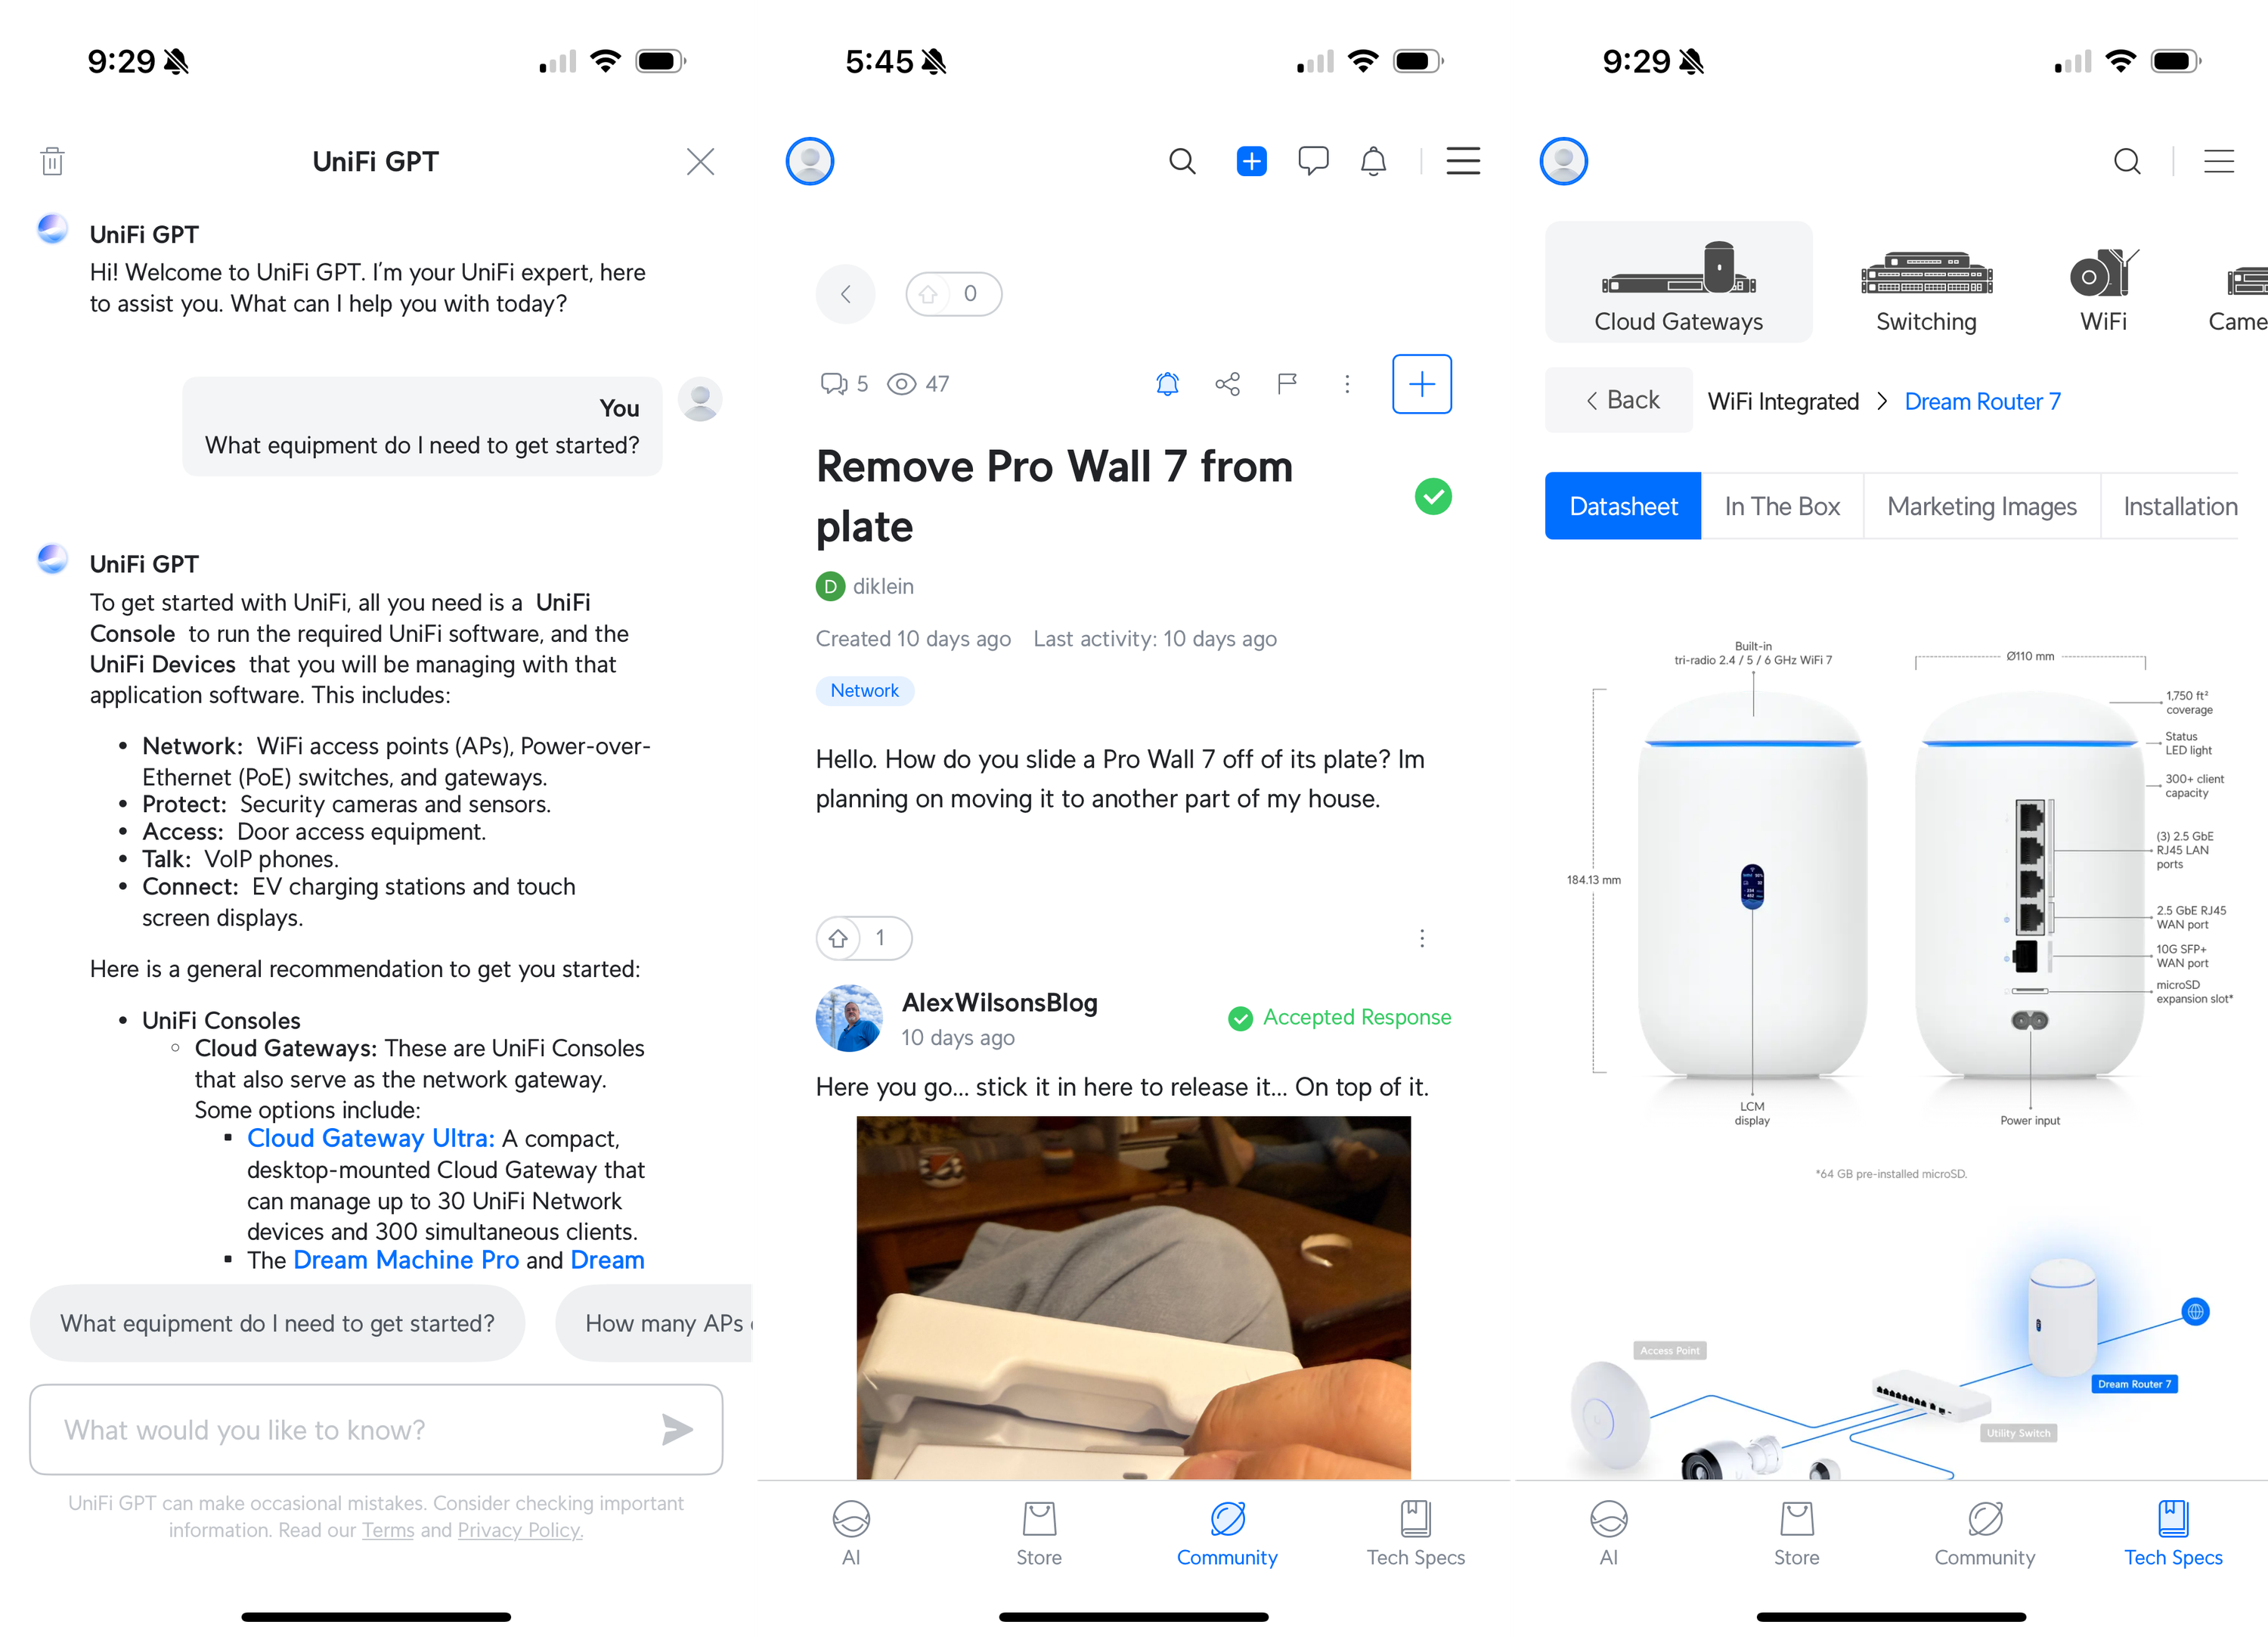
Portal offers an AI assistant named UniFI GPT, a store (which I used to purchase an additional access point), forums (which I used to ask a question and promptly receive a helpful answer), and tech specs for every Ubiquiti product. I’m always hesitant to post noob questions in a forum because of how insufferable experts can be in responses. I was pleasantly surprised to receive kind replies.
Web app
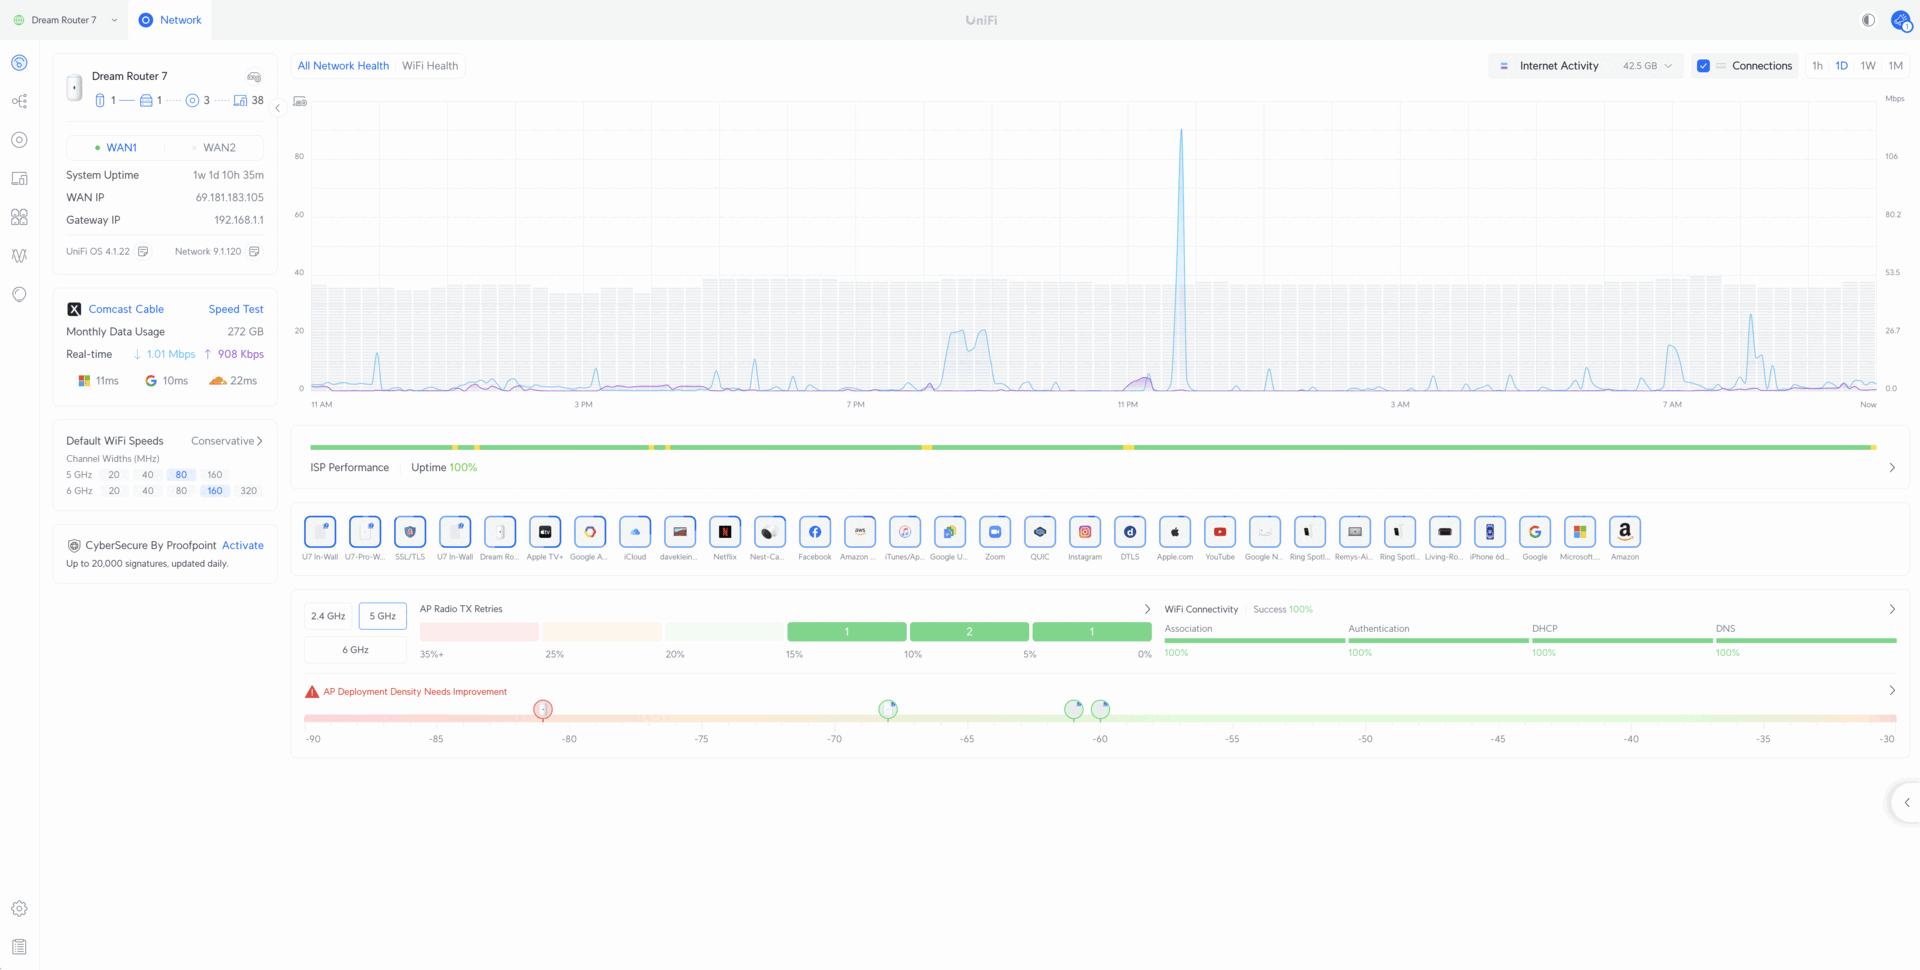
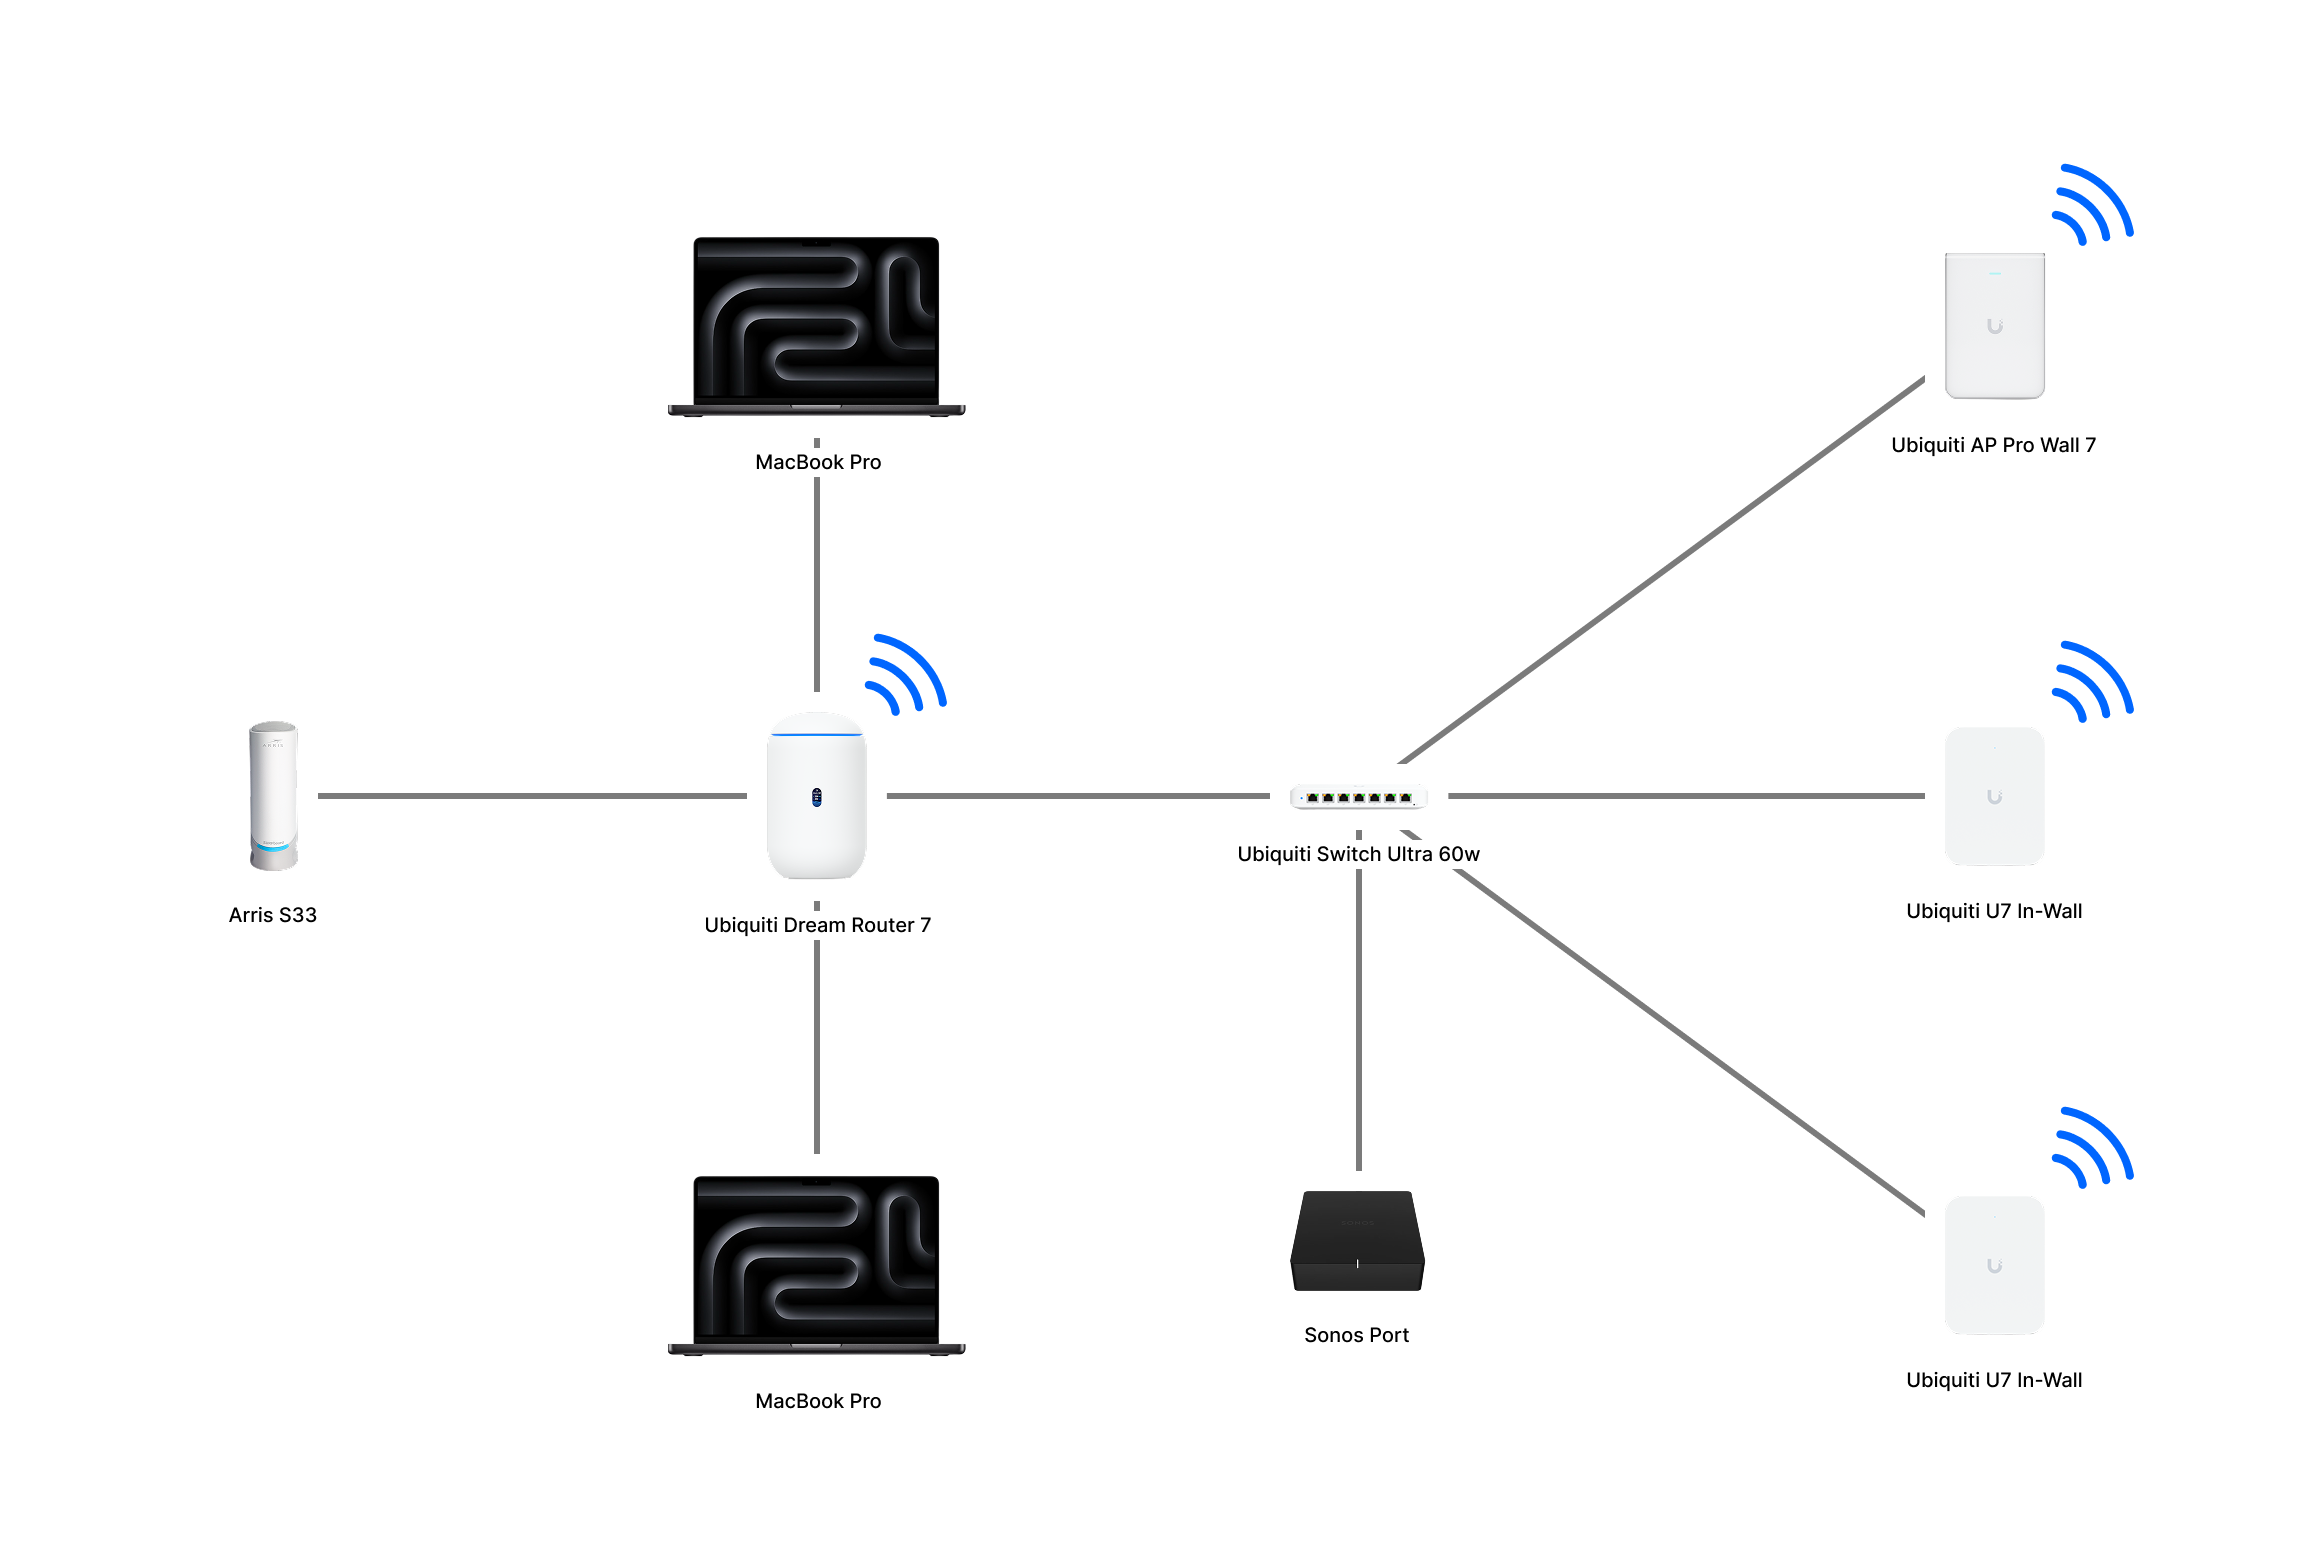
The UniFi web app can be accessed by navigating to unifi.ui.com. If you’re still reading this then you have definitely navigated to 192.168.1.1 at some point to log into your router and fiddle with settings. Ubiquiti’s portal is unmatched in its capabilities and data. The gif below includes screenshots of the dashboard, topology, UniFi devices, client devices, ports, and radios screens. I’m particularly entertained by the topology screen which lays out how each device in the house is connected to the network similar to a complex org tool at a large company.
Summary
I spent a few minutes creating a diagram in Figma to demonstrate how data flows through the various Ubiquiti products. I did not include the dozens of wireless products like Apple TVs, air purifiers, smoke detectors, etc. You can see the complete topology above in the animated gif.
Knowing that this project was coming I planned ahead by capturing a Speedtest.net screenshot that I could use for comparison. The left screenshot was taken with the Asus mesh networking setup, and the right was taken with the Ubiquiti setup. The improvements are clear.
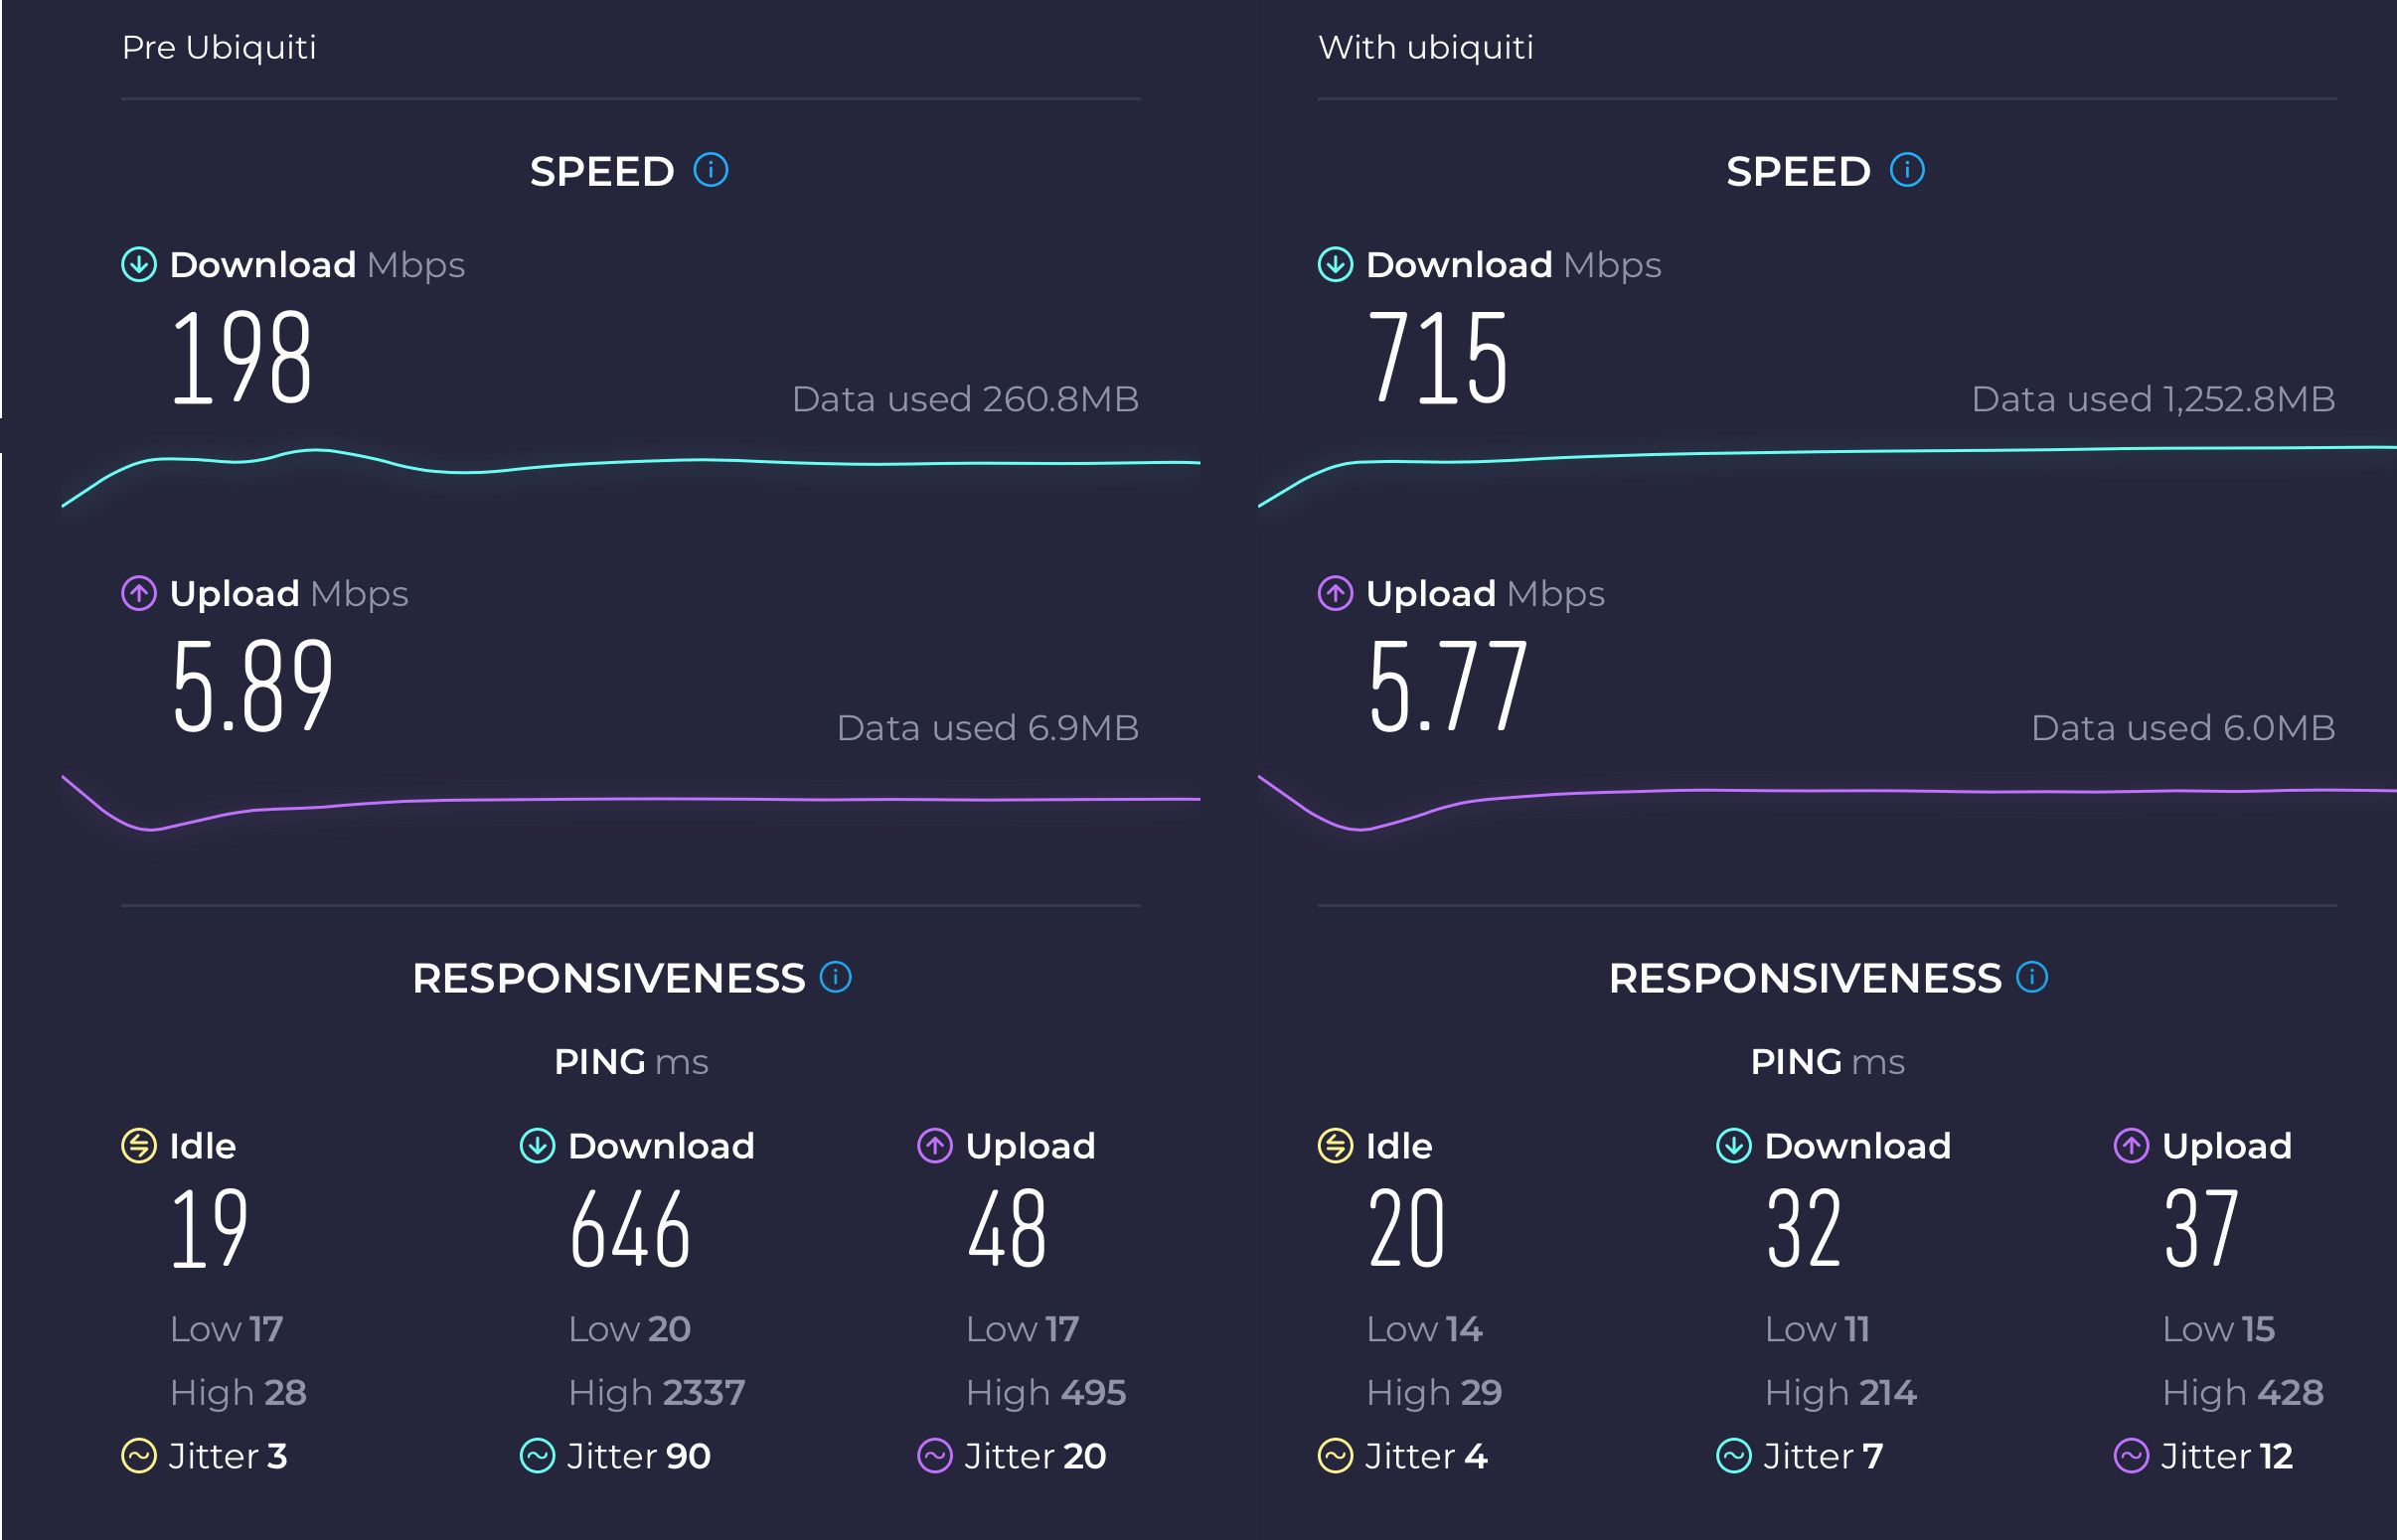
Of course this is not scientific but the download speed on my iPhone 16 Pro shot up to 715 Mbps from 198 Mbps, and the ping time plummeted. It was a mistake to also not perform a test on my MacBook Pro which is not equipped with WiFi 7 yet.
This was a fun project filled with twists and turns. (Seriously who spends the time and money to install ethernet cables but neglects to finish the project by actually connecting the cables to jacks and keystones?) I’d like to thank my brother in law, Zach, for supplying me with hardware, and my wife for her patience as I continue to temporarily disable the network while further experimenting with settings. If you are looking to truly master WiFi, dump that system you have now and upgrade to Ubiquiti.
Oh, and install some damn ethernet cables.